ChatGPT
Overview
Connect ChatGPT to your SolarAssistant account to ask questions in plain language. ChatGPT reads your sites, live metrics, settings, events and shop orders through the SolarAssistant MCP server, and can even build your solar business customer portal.
You sign in with your SolarAssistant account. There is no API token to create and nothing to install. ChatGPT only sees the sites your account can already see.
Step 1 - Turn on developer mode
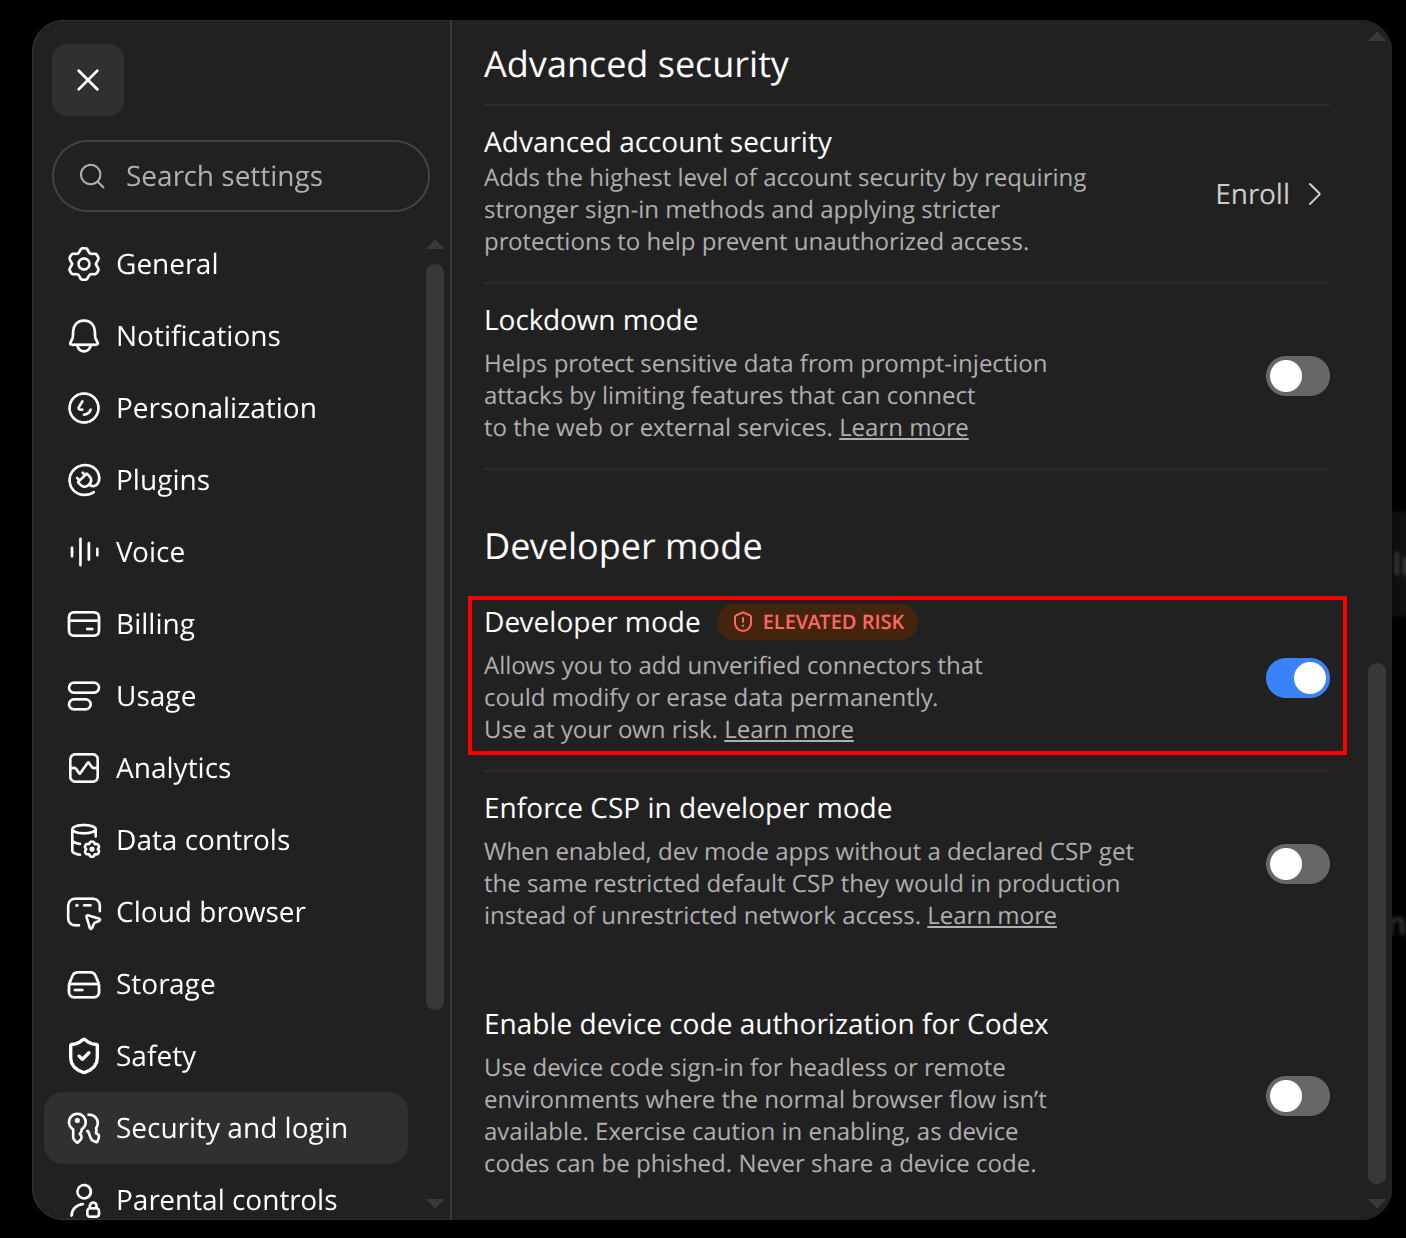
In ChatGPT, open Settings, select Security and login and turn on Developer mode. ChatGPT only lets you add your own MCP server while developer mode is on.
Step 2 - Add the SolarAssistant plugin
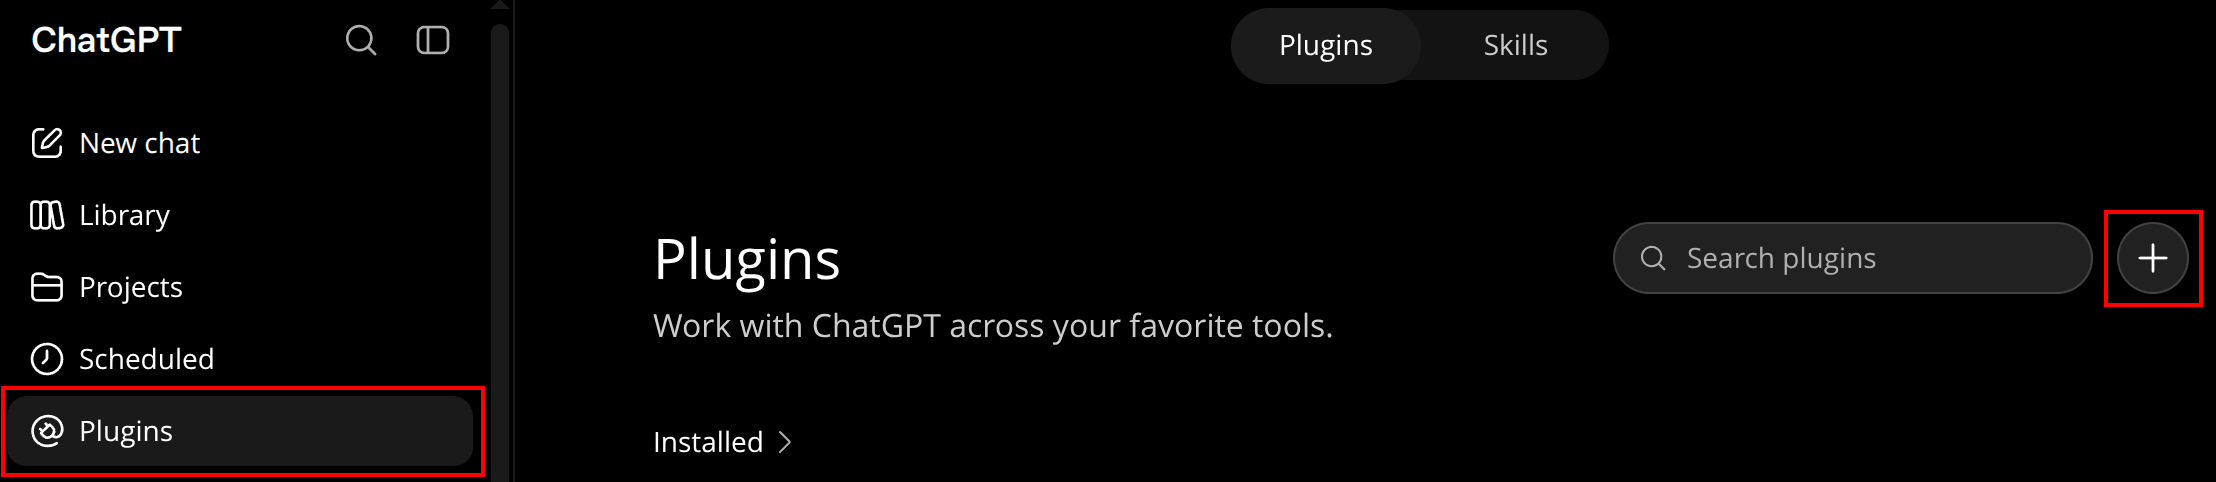
Select Plugins in the menu on the left and click the + button next to the search box. The Plugins page under Settings has no button to add one.
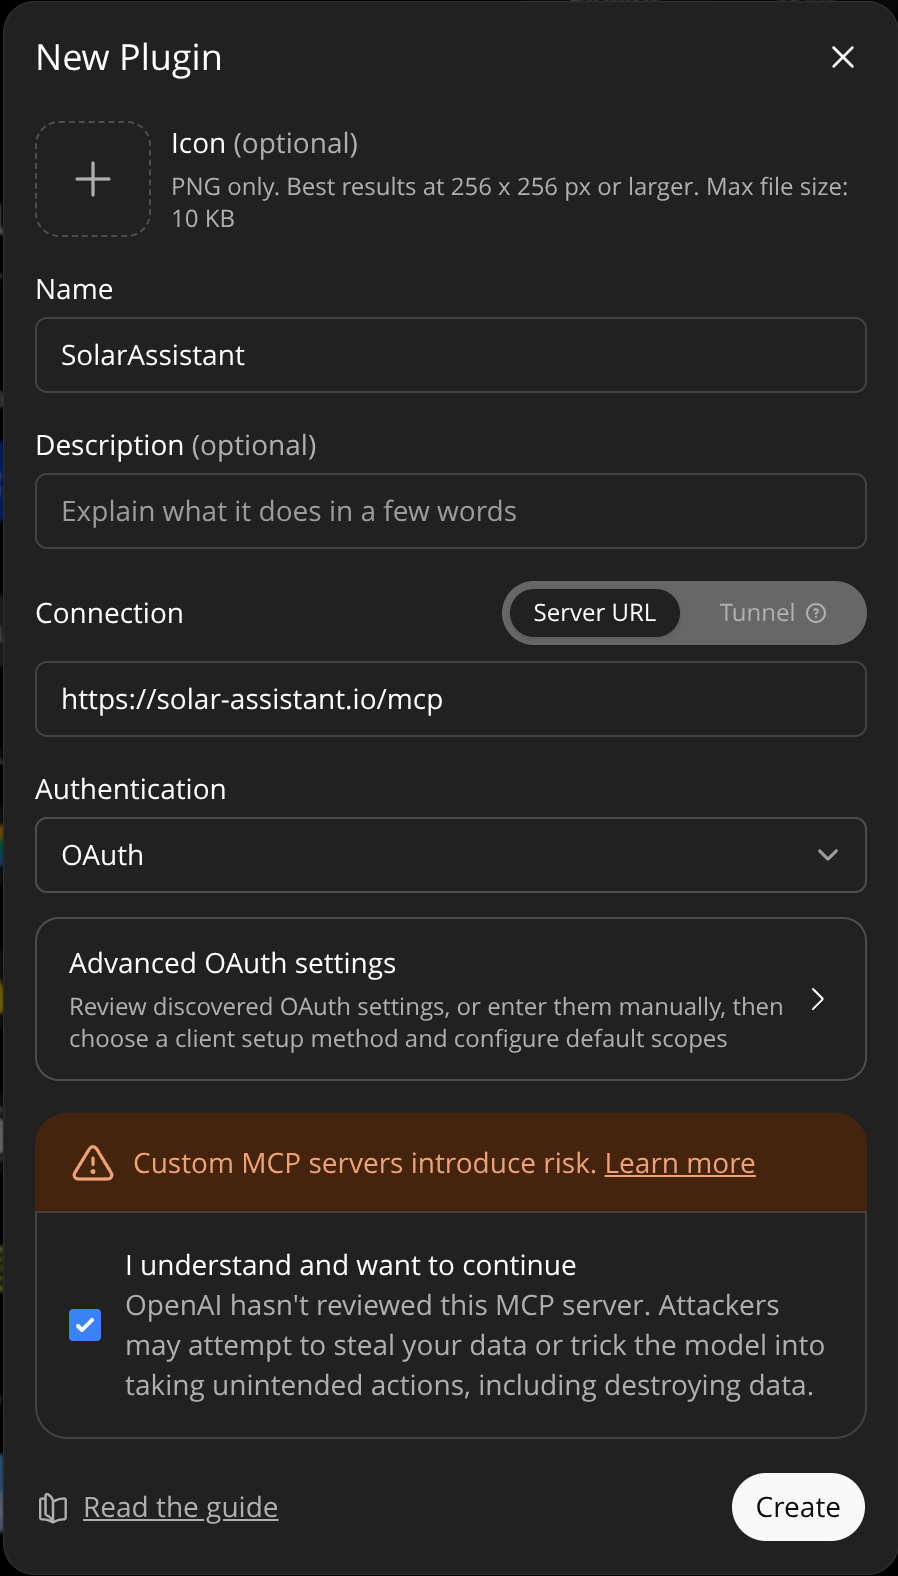
Enter SolarAssistant as the name. Under Connection, keep Server URL selected and enter the following:
https://solar-assistant.io/mcpChatGPT sets Authentication to OAuth. Tick I understand and want to continue and click Create.
Step 3 - Allow access
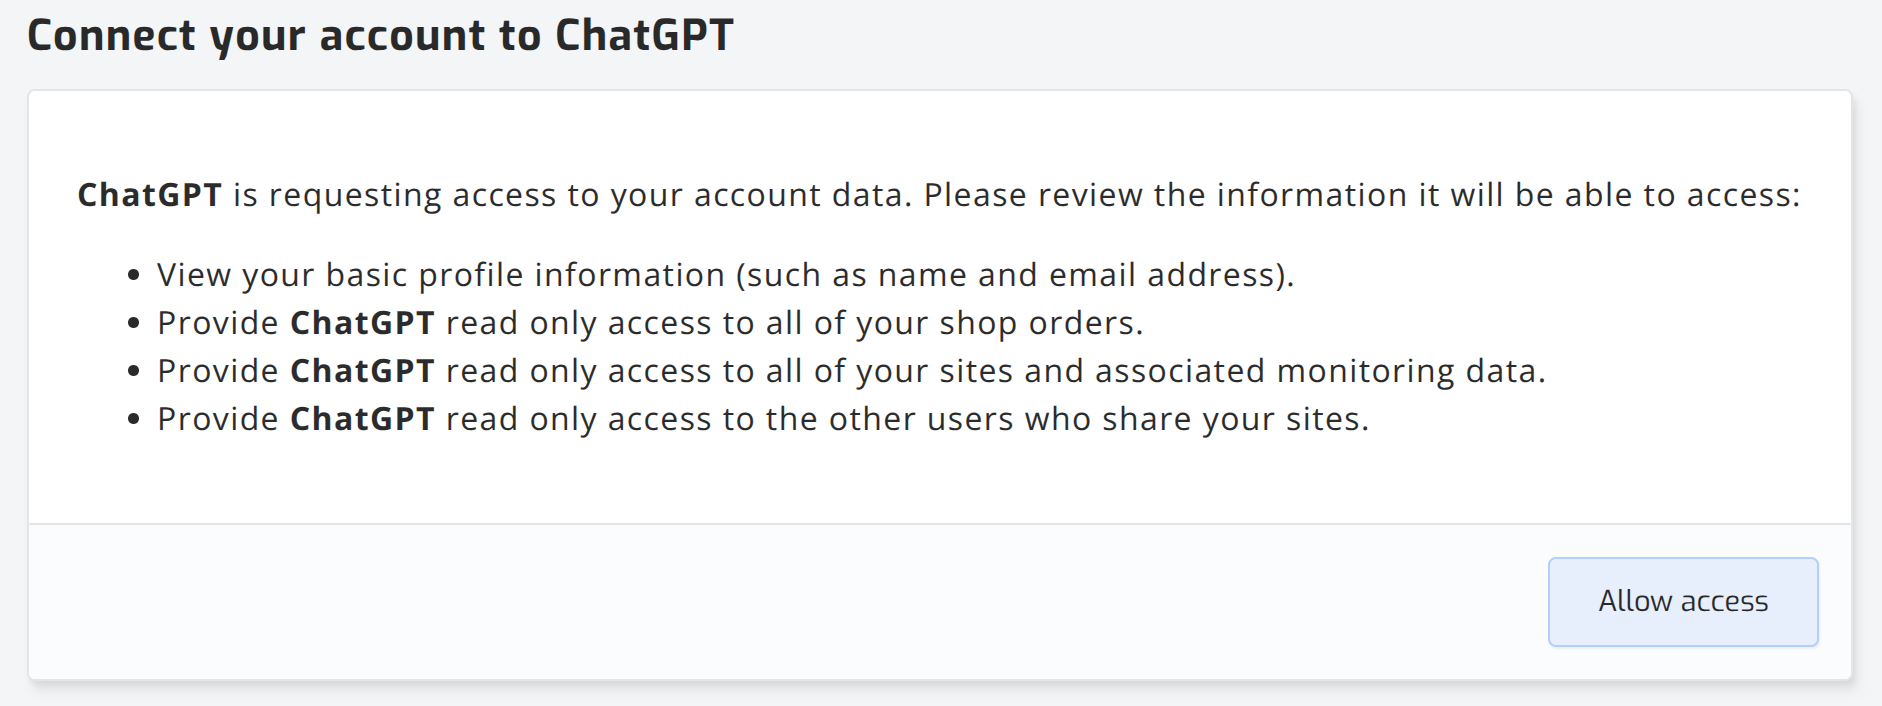
Sign in to SolarAssistant if you are not signed in already. Review what ChatGPT is asking for and click Allow access. All of the access is read only.
You are returned to ChatGPT and the plugin is ready to use.
Step 4 - Ask ChatGPT about your system
Start a chat, click the + next to the message box and select SolarAssistant.
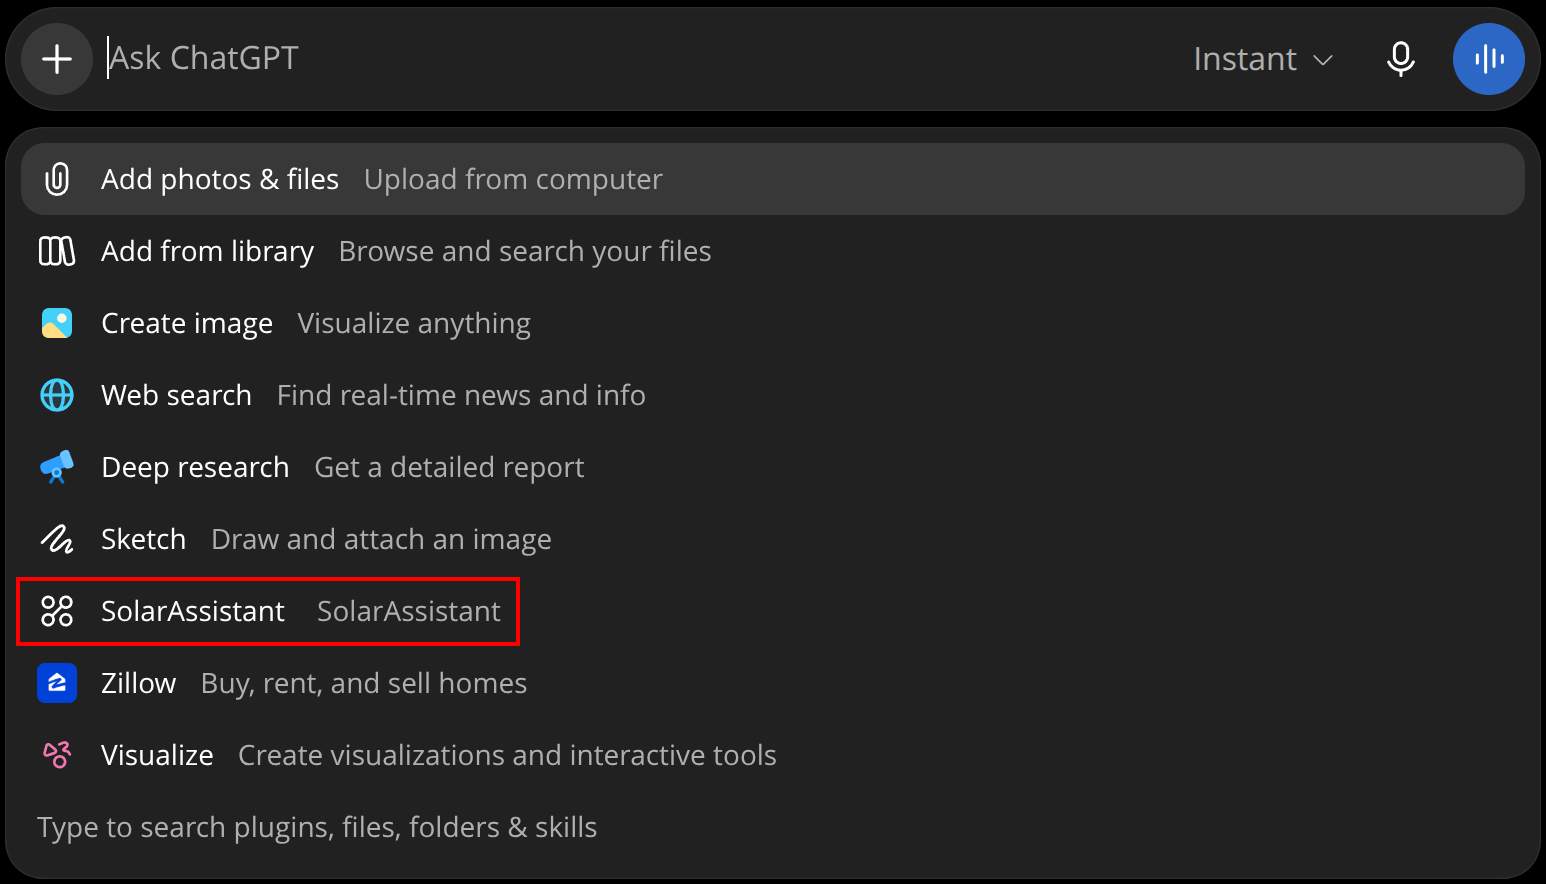
Then ask a question. Some examples:
Find out what went wrong
"My inverter just switched to grid, check my settings and figure out why that happened."
Save more on grid energy
"Look at how my system has been running and tell me if there are inverter settings you would change to use less grid energy."
Build your own customer portal
"Help me customize a custom solar monitoring portal for my business."
Troubleshooting
If you run into any issues, please contact our support team.