Automation - Rule table
Step 1 - Navigate to power management
Open the power management section of your device by selecting the tab as displayed in the screenshot below.

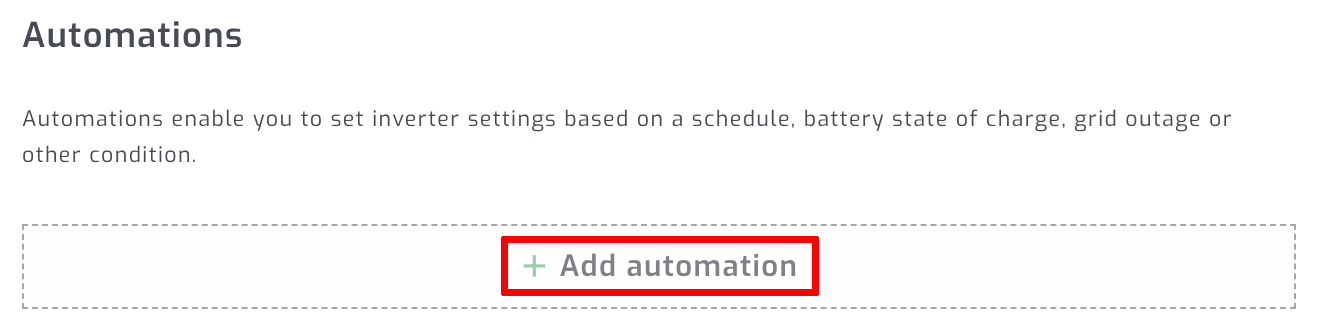
Step 2 - Create new automation
Scroll down to automation and select "Add automation".
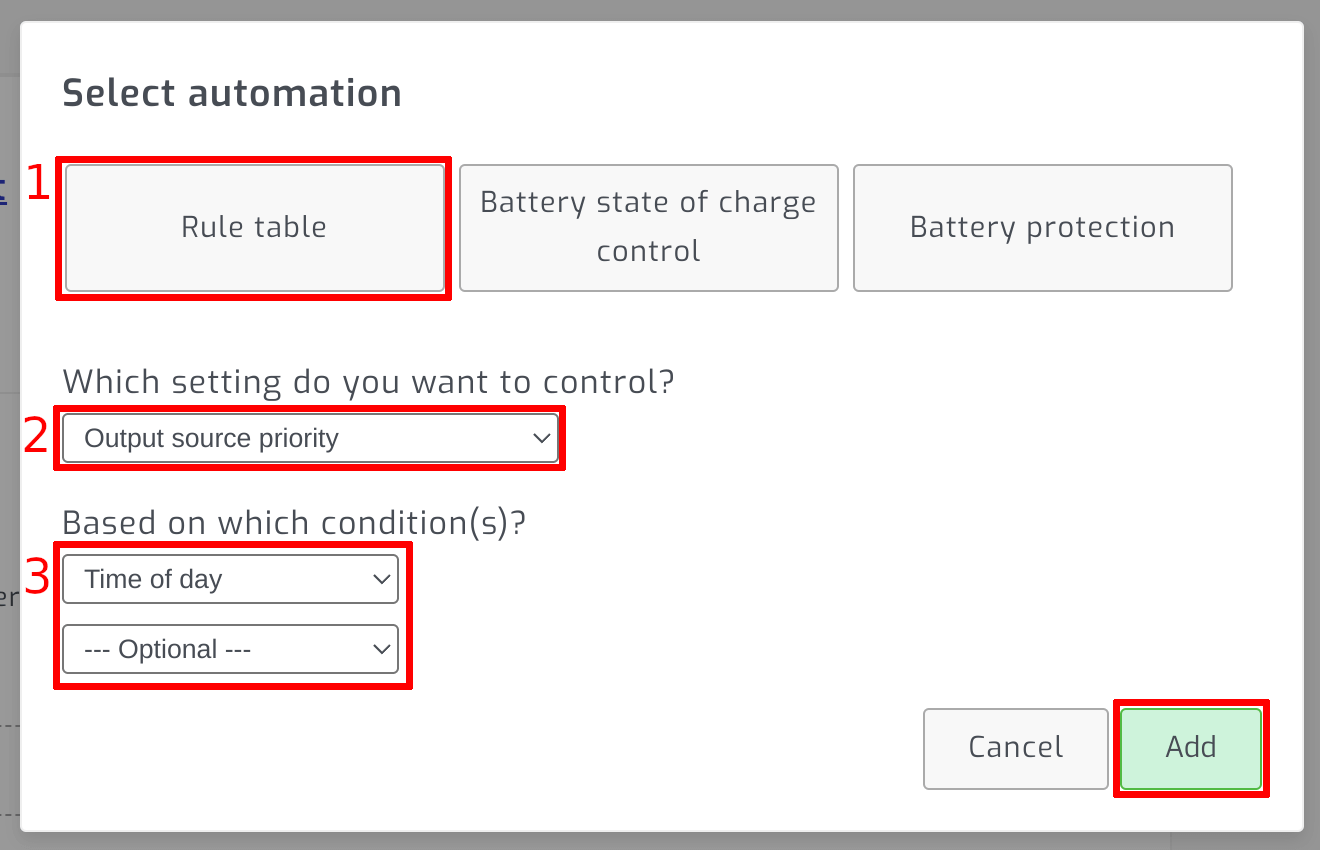
Step 3 - Select "Rule table", setting and conditions
Select "Rule table" as the type of automation we want to create. There is a wide variety of automations possible with this functionality. Please see the examples below to familiarize yourself with what is possible.
Please note: When setting up time based rule tables, time ranges cannot be set from before midnight to after midnight. We found this creates cyclic logic that is difficult to understand and maintain. It also causes the automation to not behave has hoped. Thus, we would recommend setting up time ranges from midnight to midnight instead. Ideally, from 00:01 to 23:59 in as many rows as needed.
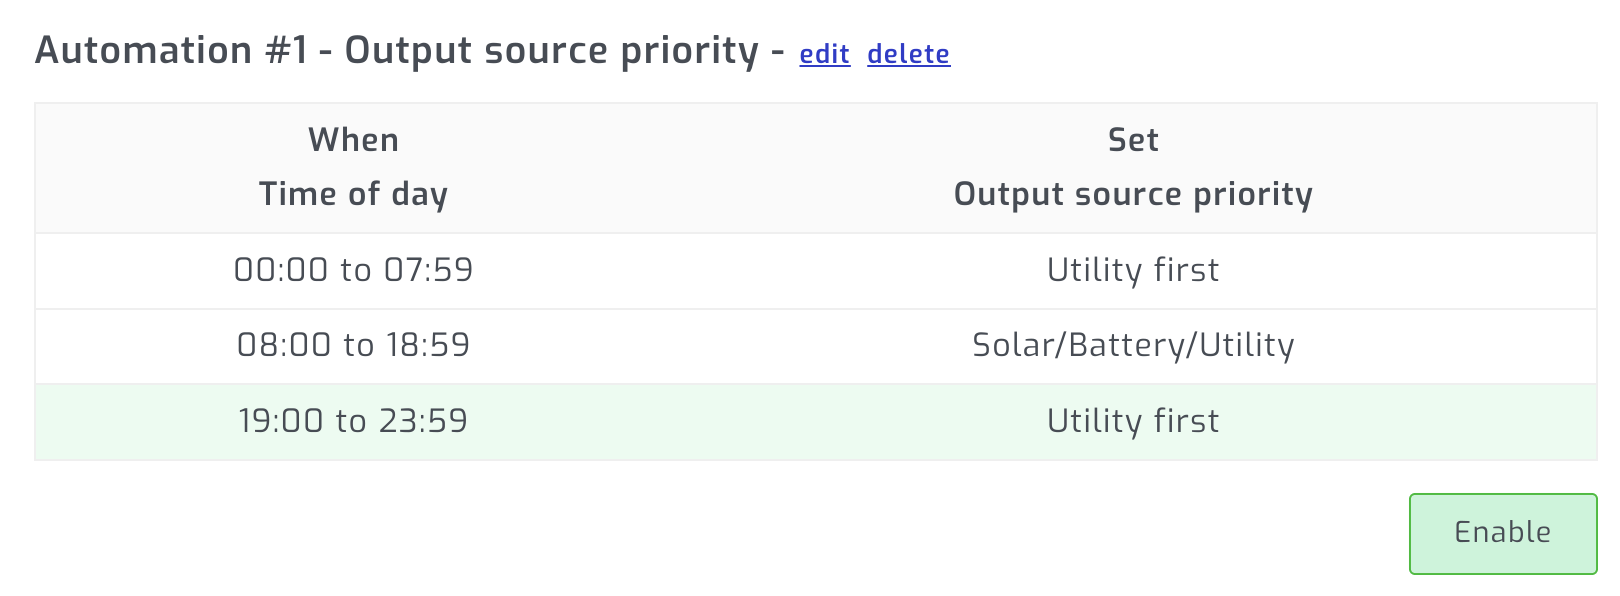
Example 1 - Automate according to time of day
This example applies to Voltronic inverters. SolarAssistant sets the "Output source priority" inverter setting based on a schedule so that the inverter uses batteries during the day and grid power at night.
Note that in "Solar/Battery/Utility" mode the inverter might still use grid power depending on the "To grid battery voltage" and "Back to battery voltage" inverter settings.
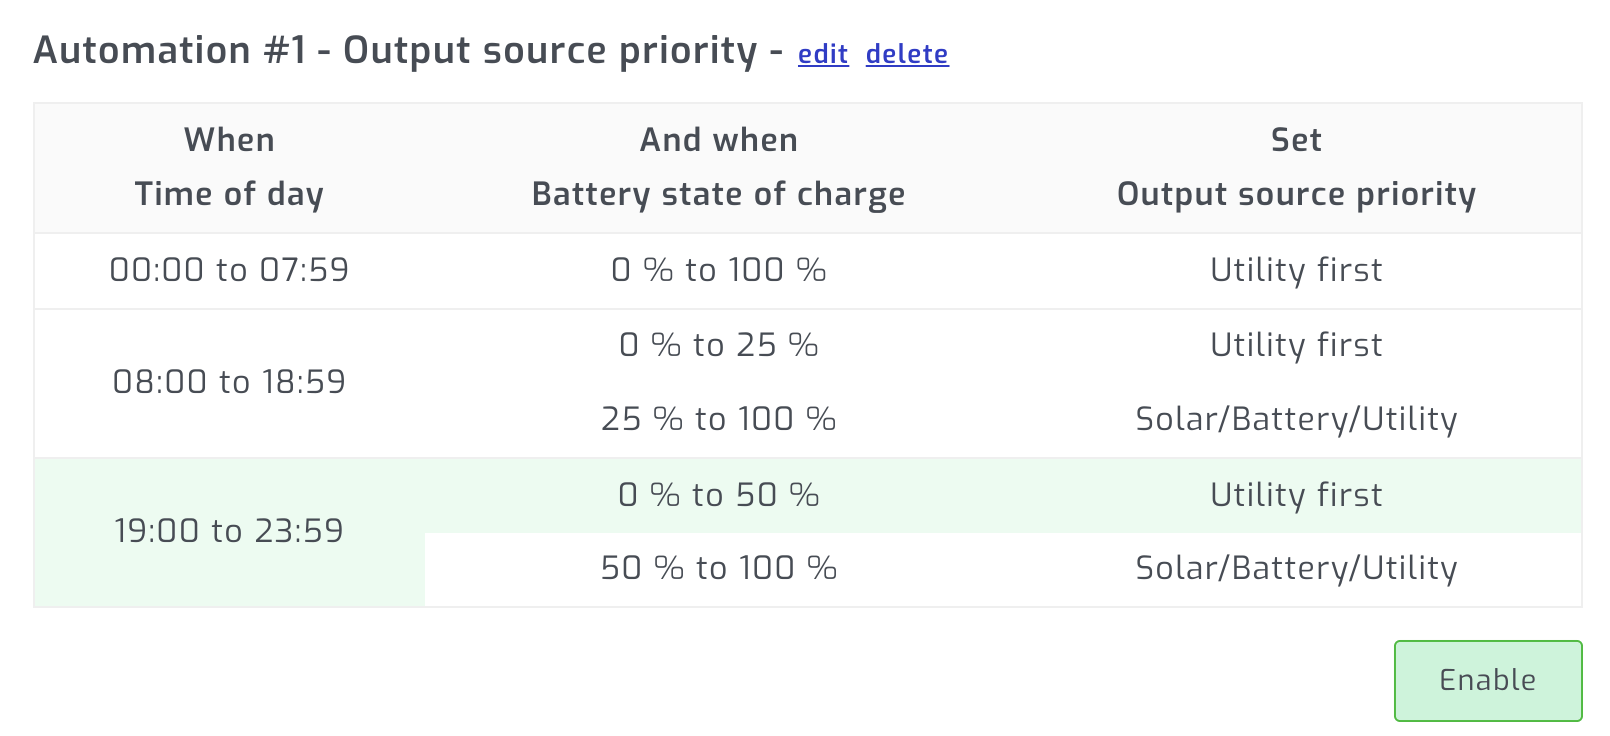
Example 2 - Automate on two conditions
Similar to the example above, we automate the "Output source priority" inverter setting based on a schedule, additionally adding "Battery state of charge" as a second condition.
Note how the full range of "Battery state of charge" from 0% - 100% is covered for each "Time of day" slot. This ensures the automation always has an intentional "Output source priority" set and there isn't any point during the day where it simply remains on whichever value was last set.
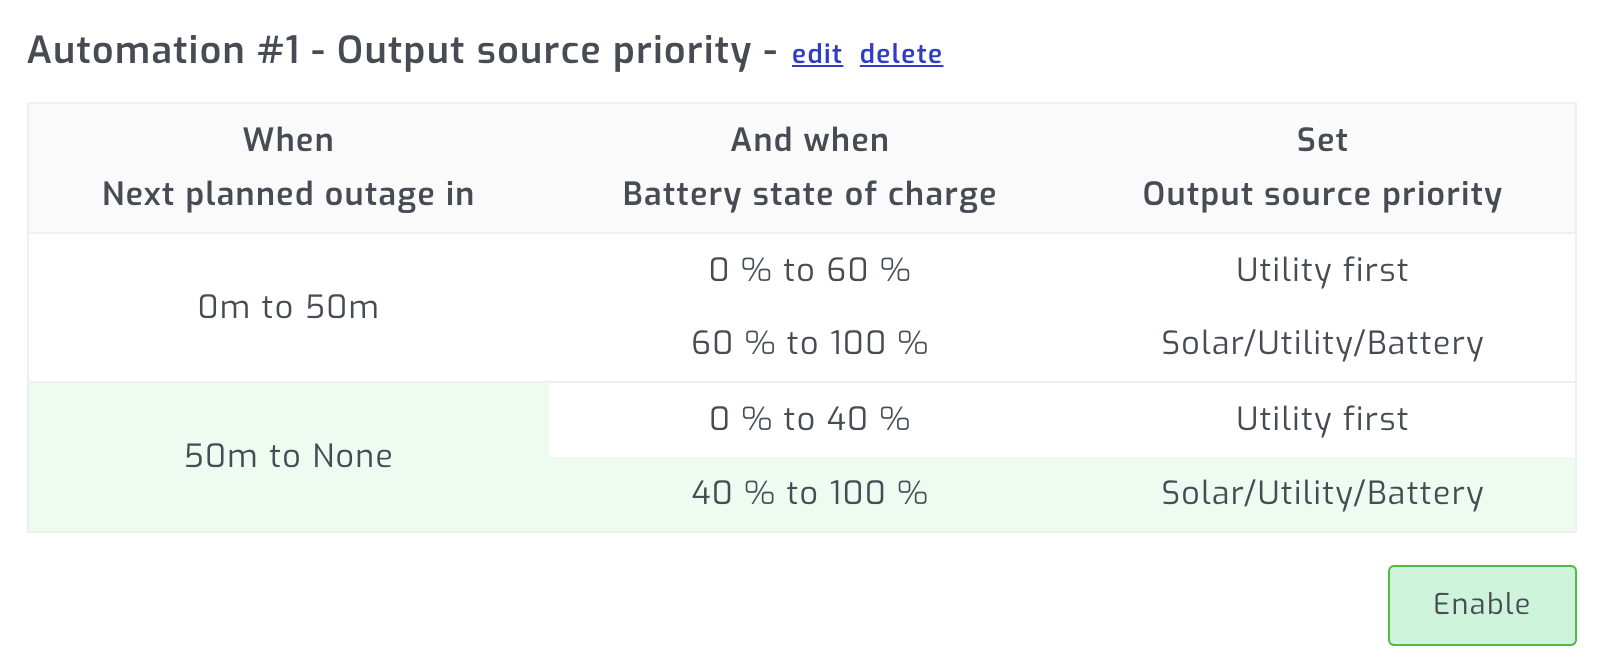
Example 3 - Automate on Eskom Load shedding
In this example, we set a Voltronic inverter to use grid if the battery state of charge is below 40%. Additionally we use Eskom load shedding schedules to use grid below 60% battery state of charge when load shedding is due to start within the next 50 minutes.
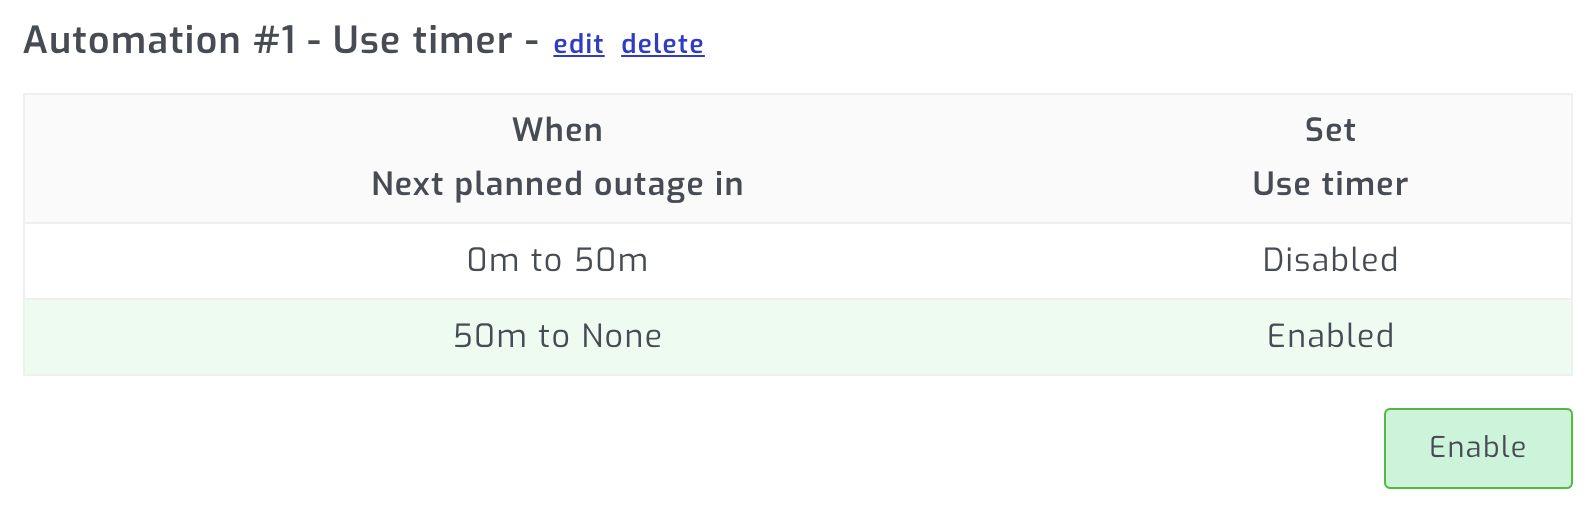
Example 4 - Automate on Eskom Load shedding
In this example, we set a Deye/SunSynk inverter to use it's work mode timer at all times, except during or when Eskom load shedding is due to start within 50 minutes. At that time we disable the "Use timer".
The "Use timer" is a convenient setting to automate that effectively disables a large section of inverter settings while simultaneously enabling a different set of inverter settings. You could for example preset the inverter to perform grid charging when the "work mode timer" is disabled up to high battery capacity levels.
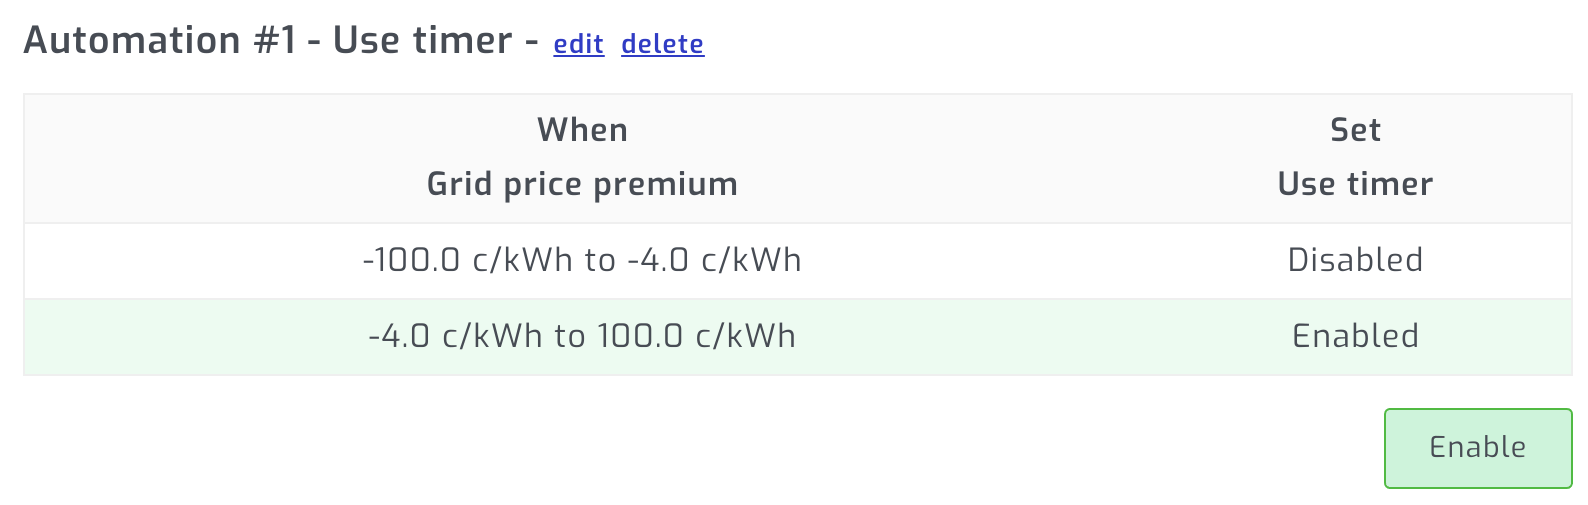
Example 5 - Automate on European grid power pricing
In this example, we set a Deye/SunSynk inverter to use it's work mode timer, at all times, except when there is a favourable European EPEX spot grid price premium. At that time we disable the "Use timer".
The "Use timer" is a convenient setting to automate that effectively disables a large section of inverter settings while simultaneously enabling a different set of inverter settings. As an example, you can preset the inverter settings to perform grid charging up to high battery state of charge levels when the "work mode timer" is disabled.
Tips and troubleshooting
Before automating a specific inverter setting, please set it manually on the inverter and confirm the setting does what you want it to do. If you want more detail on what a specific setting does, please consult your inverter manual or solar supplier/installer.
If you need further help, please consider reaching out to the helpful communities posted below:
https://powerforum.co.za/forum/148-solar-assistant/
https://diysolarforum.com/