Connecting a Giter battery
If your inverter is already reading your Giter battery, then you can simply select "Use inverter values" as the
battery source in SolarAssistant and skip this guide.
USB cable
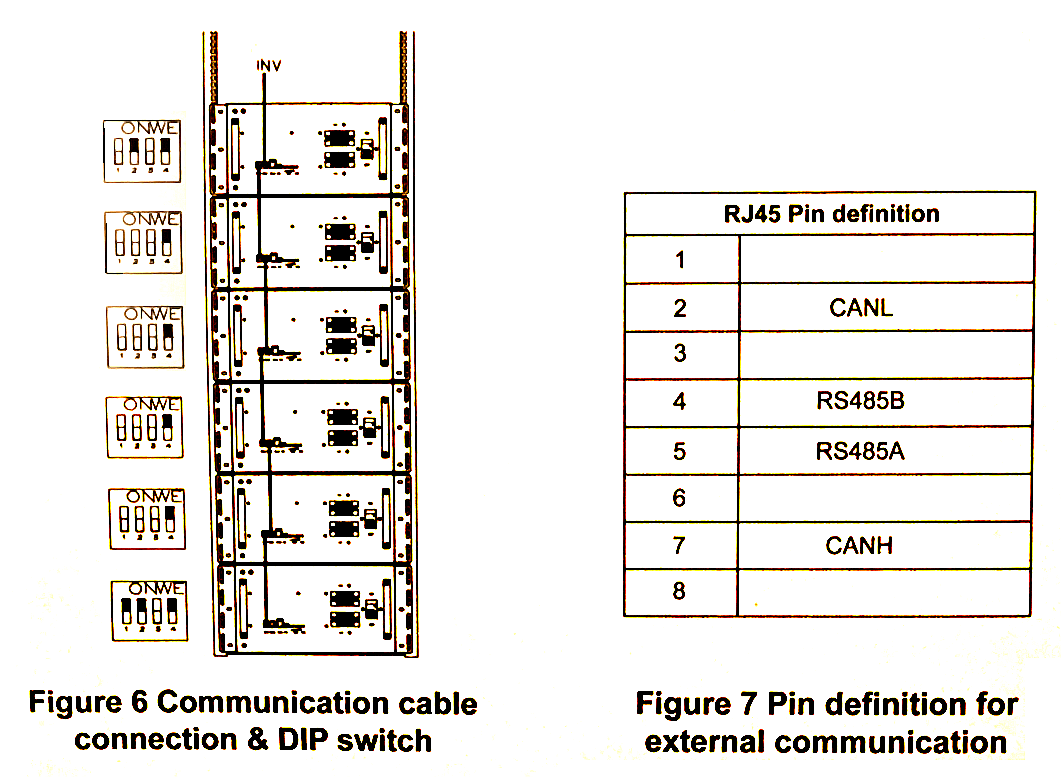
We do not sell a ready made cable for the Giter battery, but you can buy a self crimp RS485 cable to make one according to the pinout in the image from the manual below.
Dip switch configuration
From the Giter manual below, they instruct setting dip switches according to the rules below:
- First battery: turn on 2 and 4.
- Last battery: turn on 1, 2 and 4.
- All remaining batteries: turn on 4.
Protocol selection
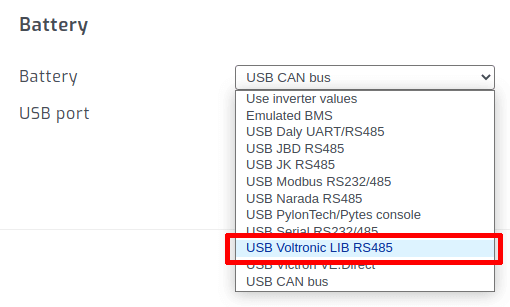
On the SolarAssistant configuration page, select the protocol below.
Result
Once you press connect in SolarAssistant, you should see each pack show up under the battery section.