Preparing devices in bulk
Overview
This guide is for organizations that prepare many supported devices at once. You request one SD card image for your organization and write it to as many SD cards as you need.
- No manual activation. A device started from your image gives itself a license or a trial, whichever your activation profile is set to, so you do not register or activate each device on the website.
- Units belong to your organization. Each device is tied to your organization, so when your customer starts using it, it already carries your branding and configuration. It stays tied to your organization even if your customer later reflashes the SD card themselves.
- A one-time internet connection is needed. Each device must reach the internet once, the first time it starts. You do this yourself, before the device goes to your customer.
Step 1 - Create an activation profile
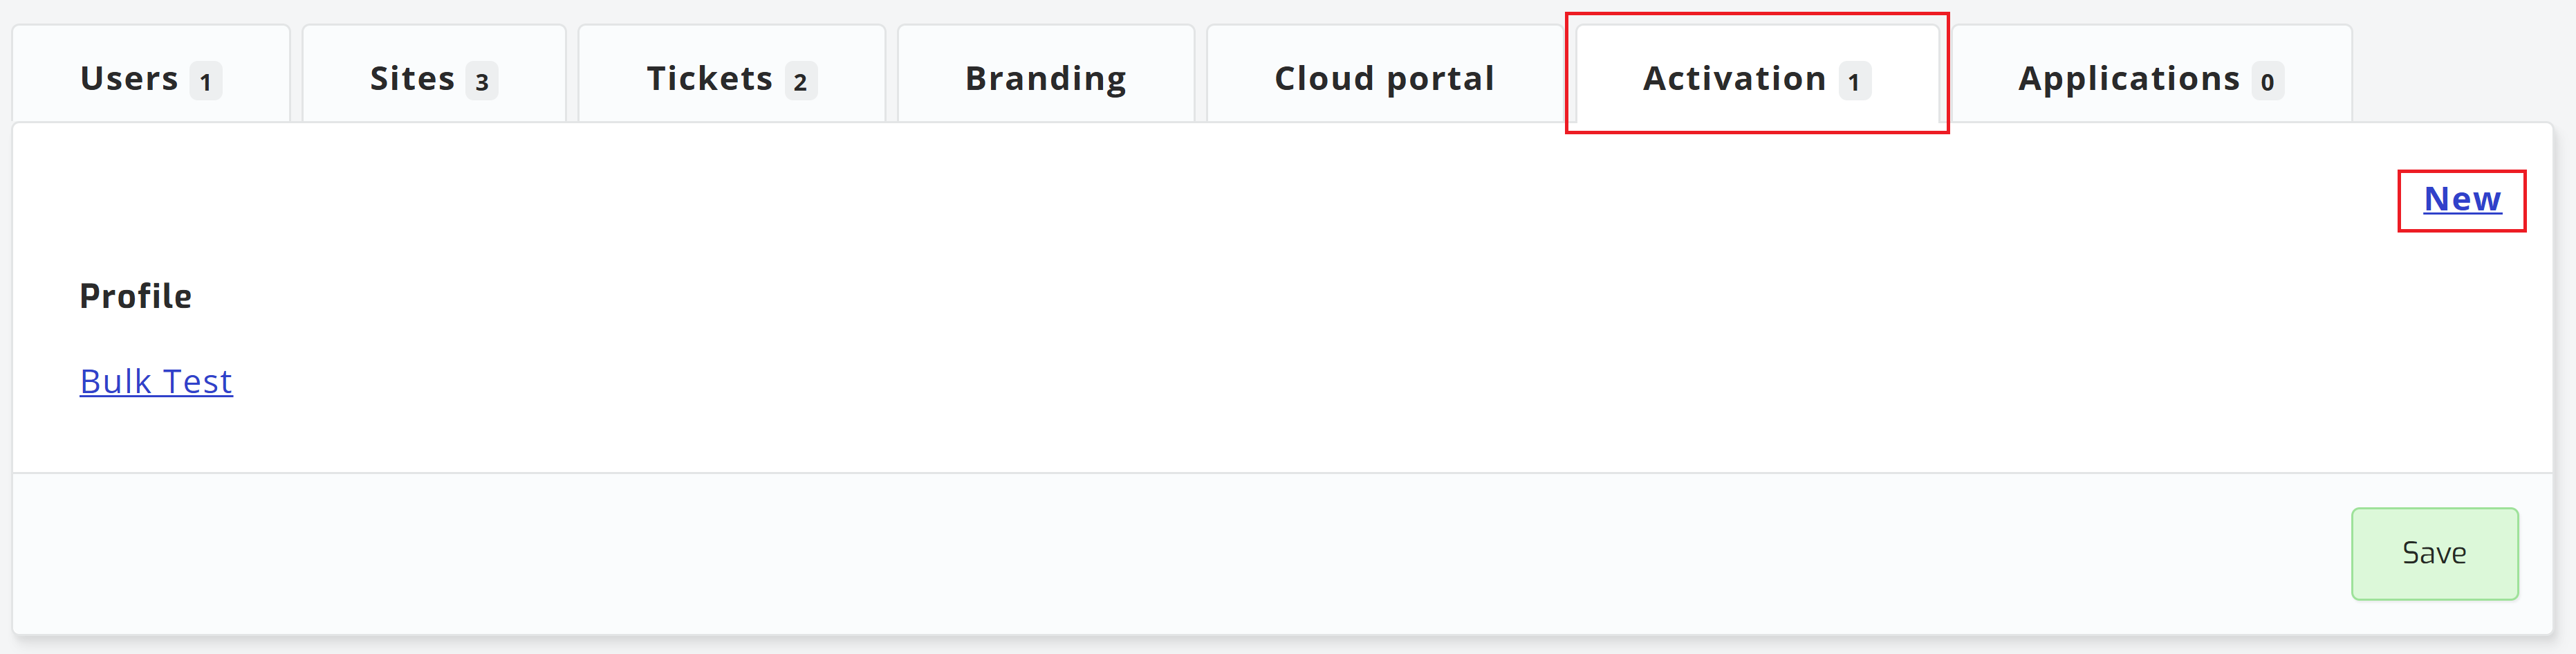
Open your user page, select your organization and open the Activation tab. Create an activation profile there. If you do not have an organization yet, you can create one for free.
Step 2 - Build an SD card image
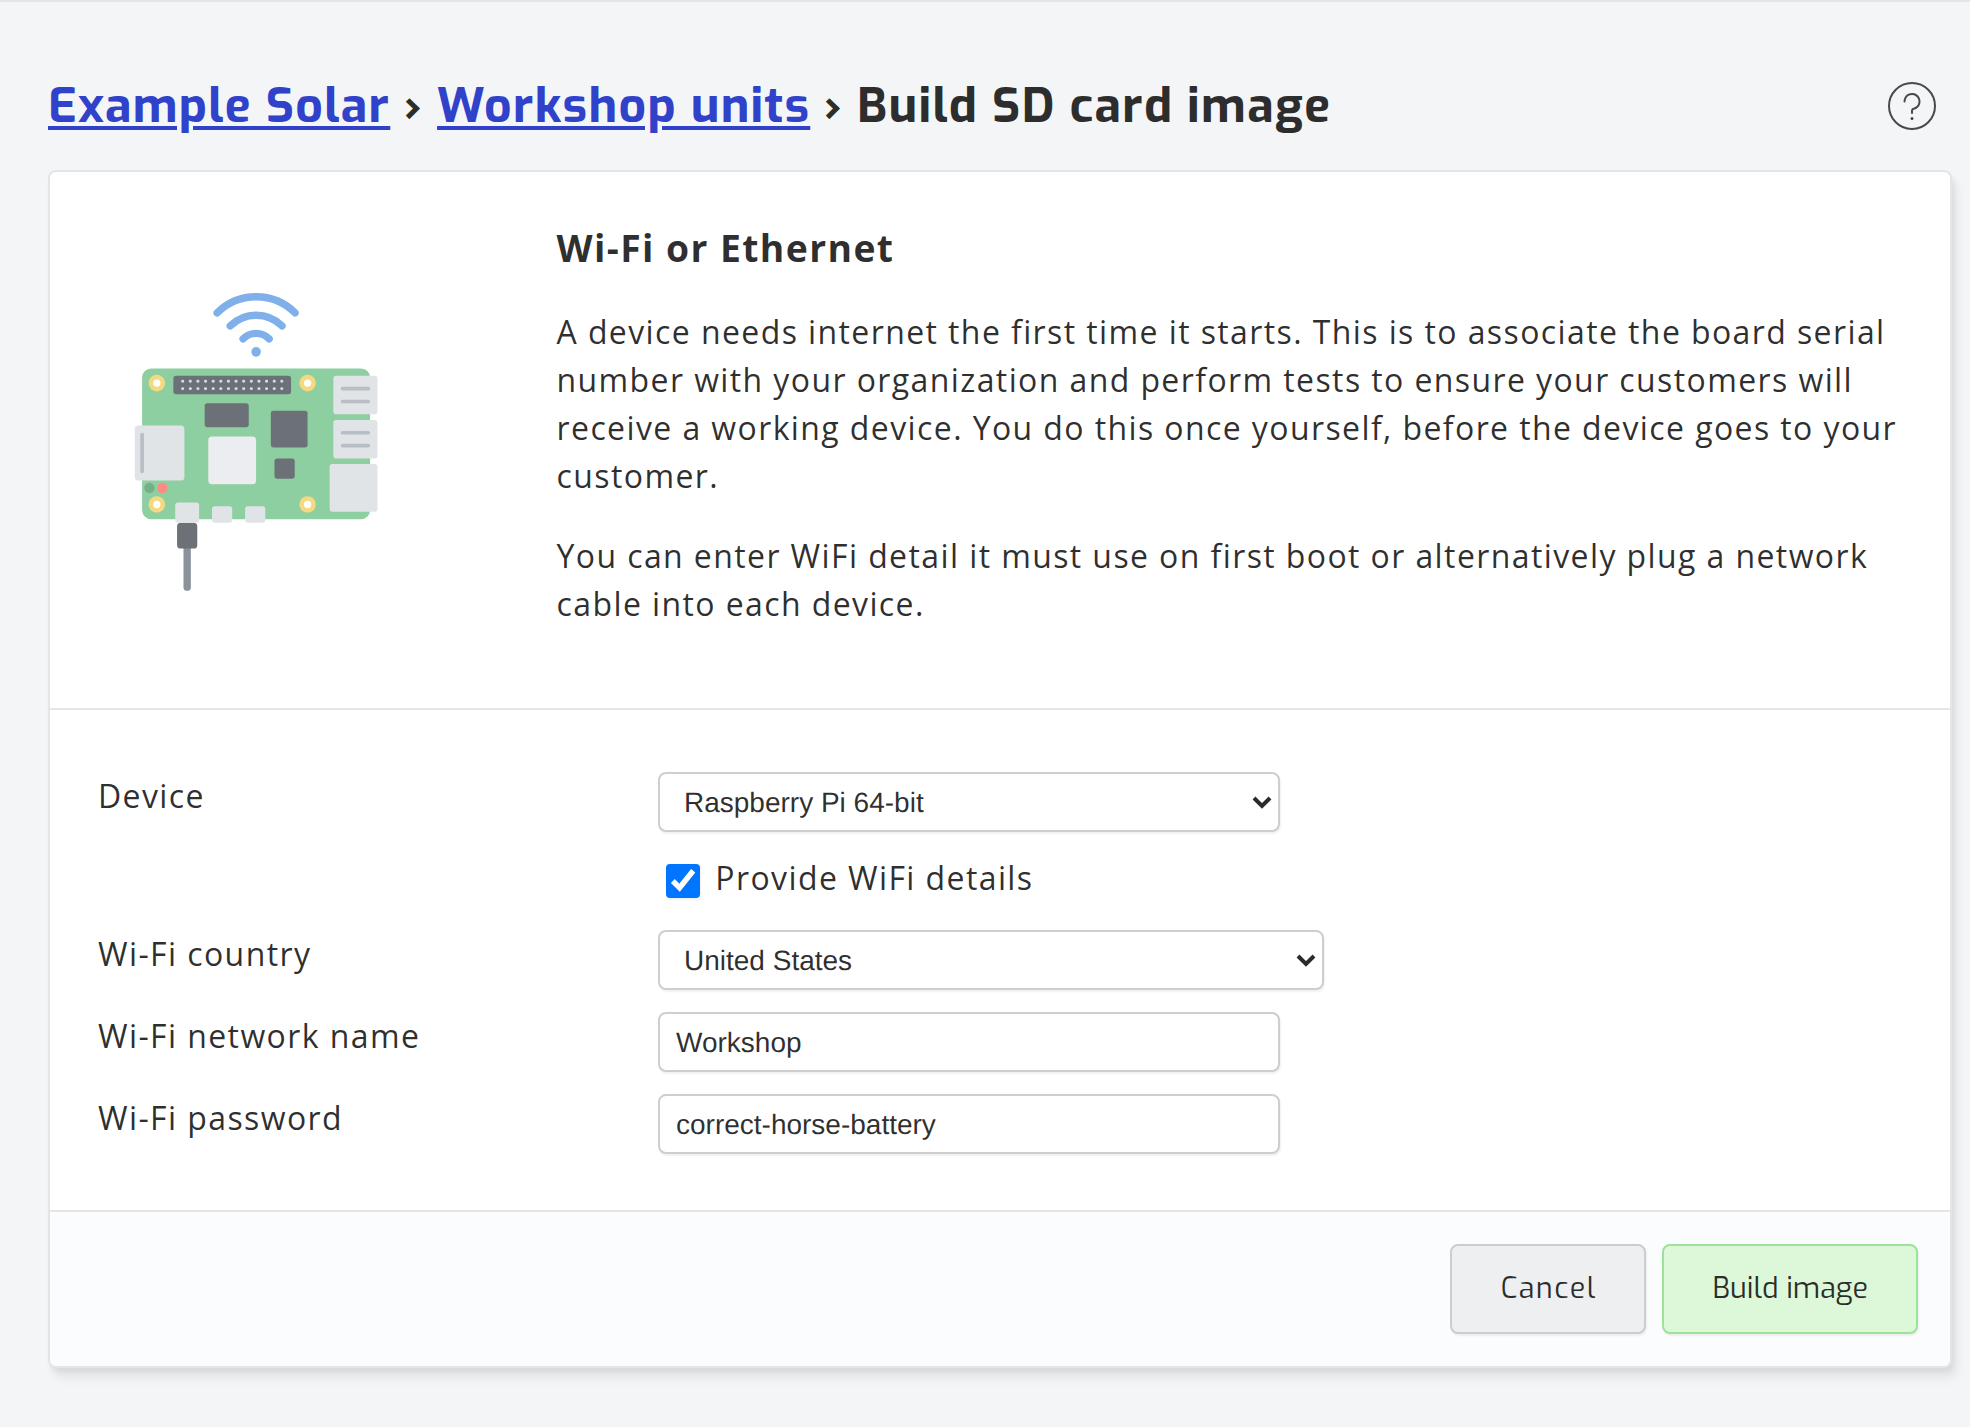
Open the activation profile, select the SD card images tab and select Build image. Choose your device and, optionally, the Wi-Fi network your devices will be in range of when you first start them, such as the one in your workshop. Without Wi-Fi details, connect each device with a network cable instead.
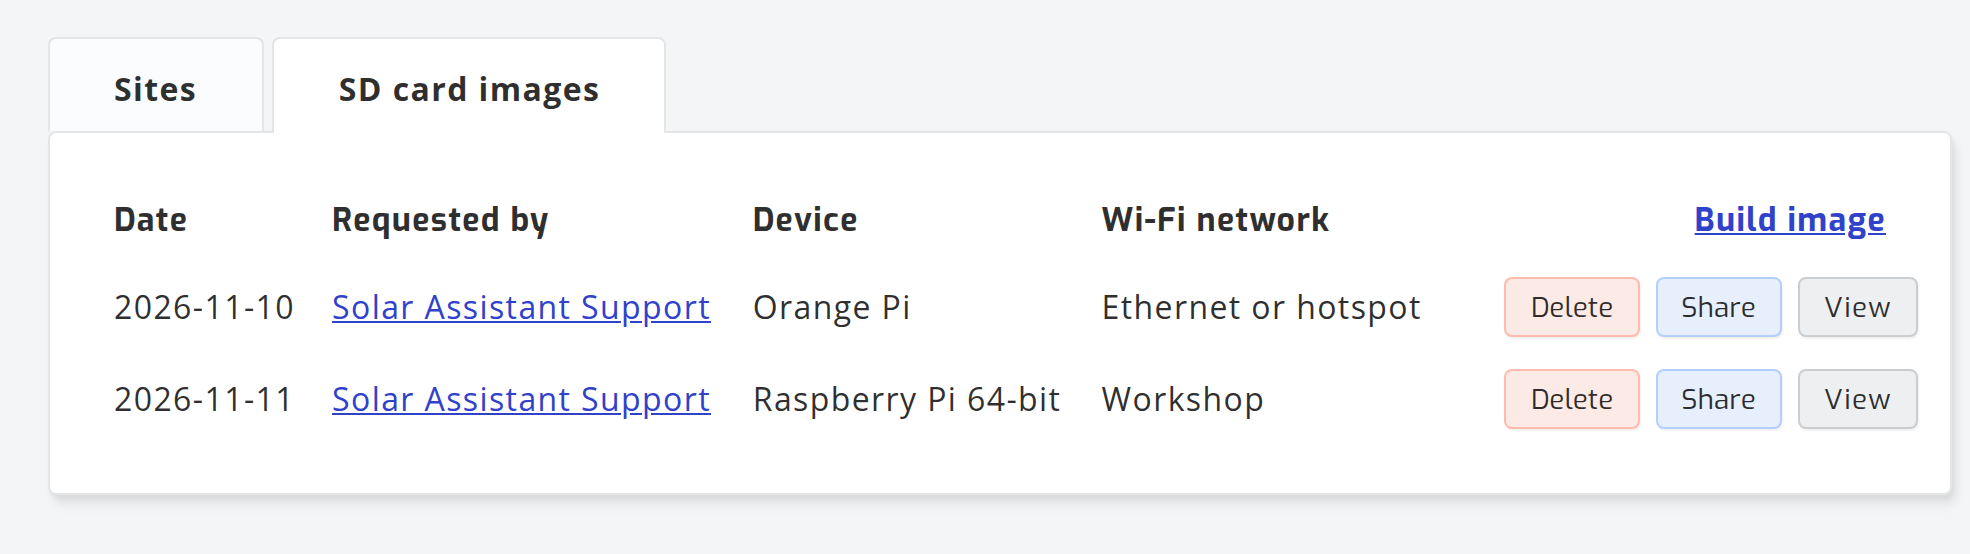
We email you when the image is ready. You can request up to 2 images in 24 hours. Select View to download it, or Share to send a download link to whoever prepares your devices.
Step 3 - Write the SD cards
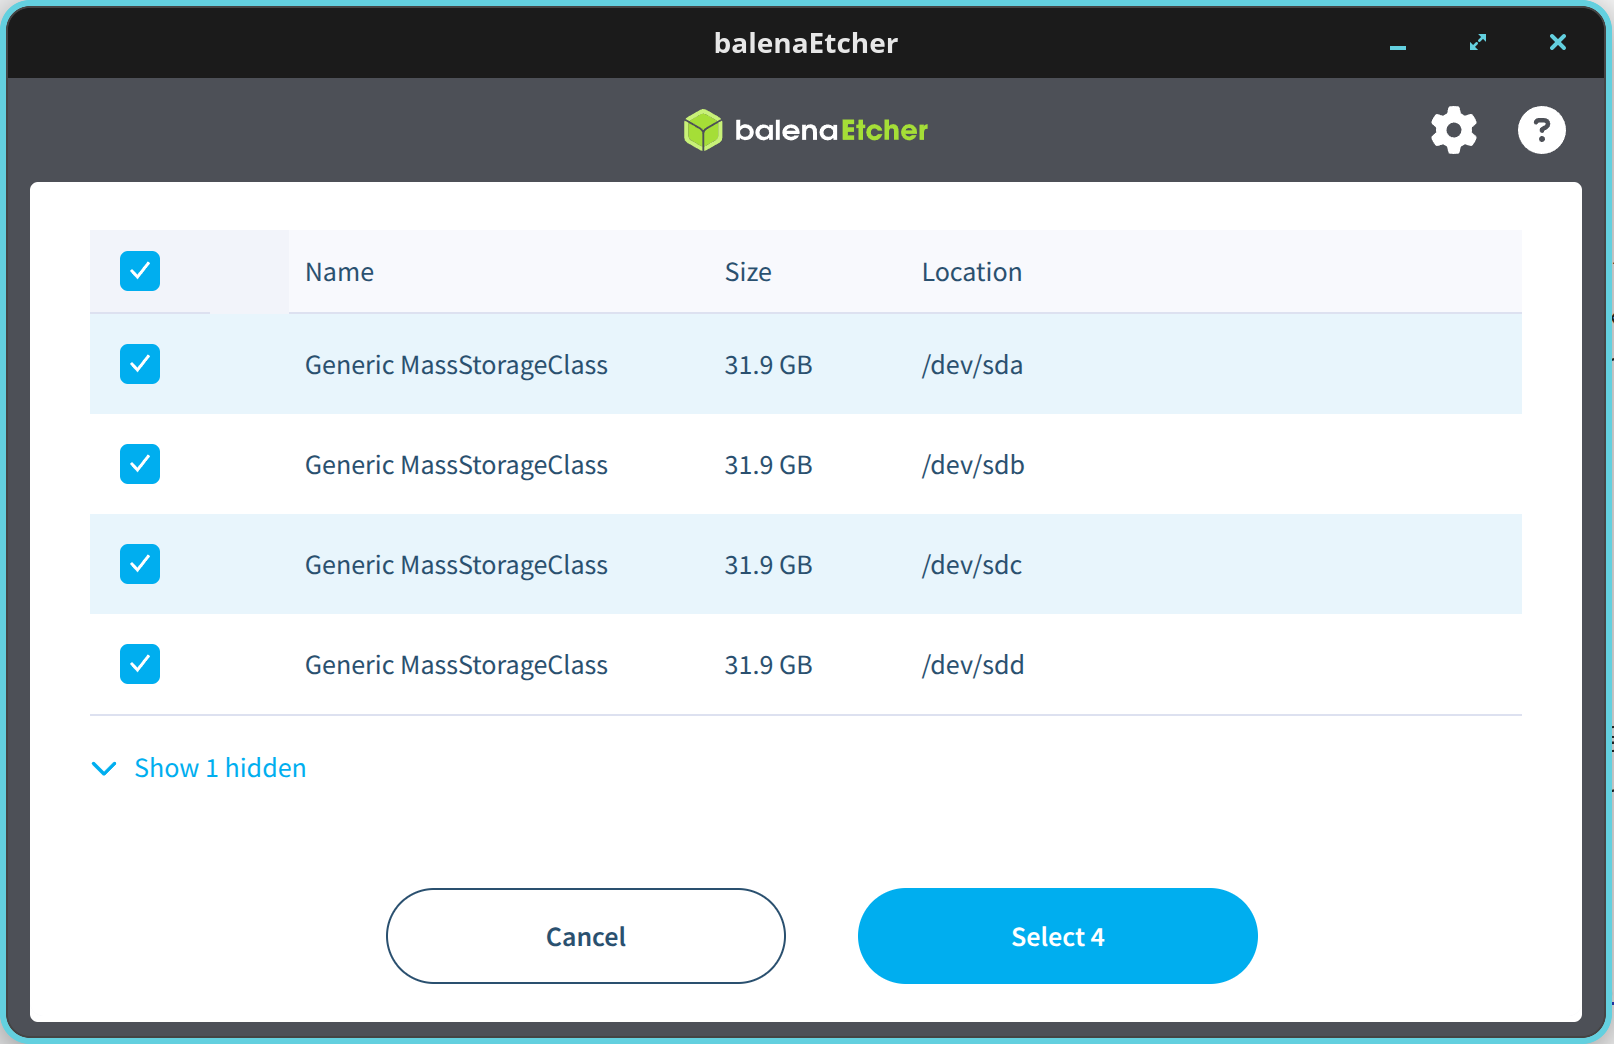
Write the image to as many SD cards as you have devices to prepare.
We recommend Balena Etcher, since it writes the image to several SD cards at the same time.
Step 4 - Power on each device until it blinks slowly
Put an SD card in a device and plug in the power. If the image has Wi-Fi details, the device connects to that network by itself; otherwise plug in a network cable.
The green light blinks quickly while the device activates. Activation is done once the light stays on for five seconds and off for five seconds. Power the device off and move on to the next one.
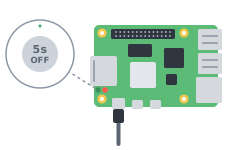
Any other sequence, such as a red light, means activation failed.
Step 5 - Send the devices to your customers
The next time the device starts, it shows your branding and configuration. Your customer can register it, and it stays associated with and visible to your organization.
Troubleshooting
Each activated device is listed on the Sites tab of your activation profile. You can also reach
them through the cloud API, and
sacli finds the units on your local network with sacli local.
If a device does not reach the slow green blink, or anything else does not work as described, contact our support team.