Connecting a Seplos BMS battery
Introduction
The steps below apply to many different batteries that use the Seplos BMS:
- Shoto
- Lithium batteries South Africa (LBSA)
- Trophy battery
This guide established RS485 communication between SolarAssistant and the battery. Always read the instructions in your battery/BMS manual and prefer that above the information below.
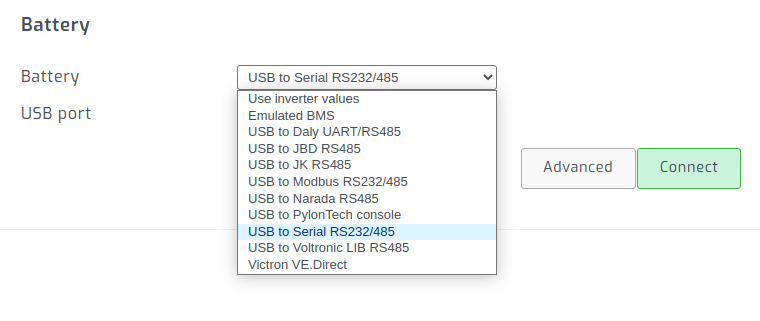
Protocol selection
On the SolarAssistant configuration page, select the protocol below.
USB cable
You can use our seplos BMS cable or create your own by using a USB RS485 adapter with the cable crimped into a RJ45 plug according the pinout as depicted in the manual. Only one cable is required to monitor all batteries in parallel.
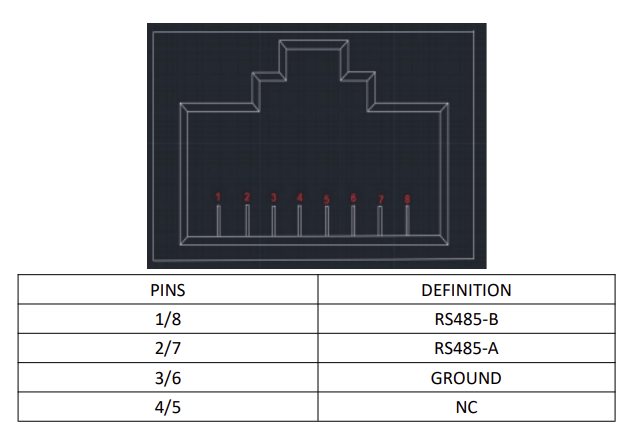
The USB RS485 cable from the SolarAssistant monitoring device is plugged into the left RS485 port of the first battery pack. The right RS485 port is to connect the next battery pack via a normal straight computer network cable.
If you are reading the battery via CAN or RS485 to the inverter, please use the parallel communication ports to use "Passive Reading". This lets us connect to the battery pack as if we were another battery in the bank. You should see an open parallel communication port on the master and on the last battery in the pack. You may have to test both, since which one works depends on the variant you have. However, this would let us read the data the batteries are sharing with one another, leaving the RS485/CAN ports open for inverter connection.
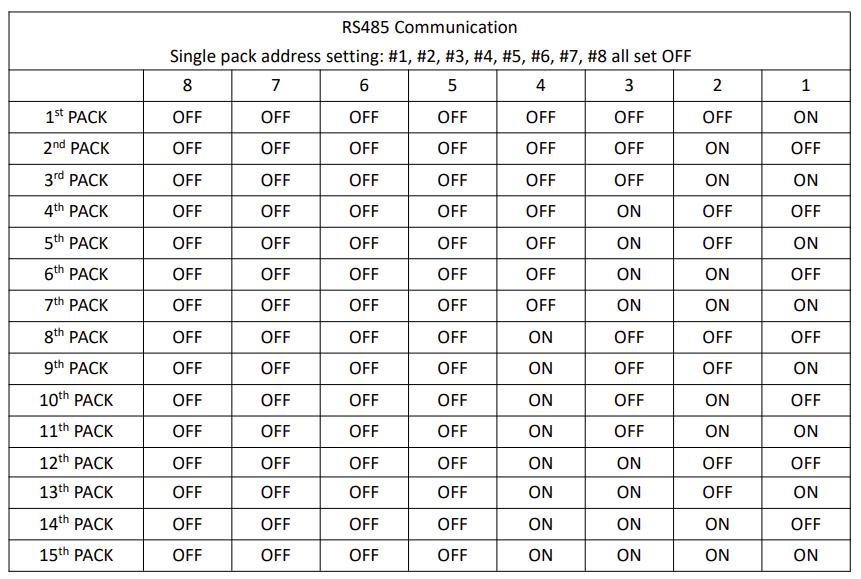
Dip switch configuration
As described in the manual, set the first pack to address 1, second to address 2, etc. Note dip switches only take effect after battery restart. Enabling dip switch 5 is for CAN communication and should not be done since we are using RS485.
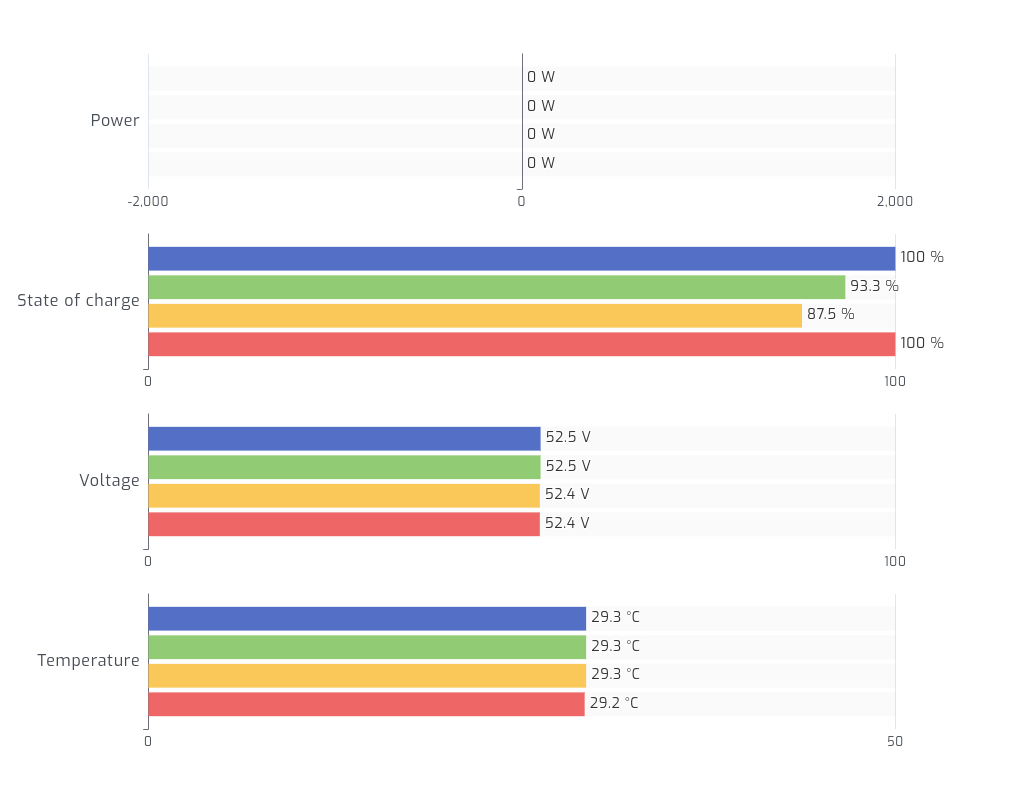
Result
Once you press connect in SolarAssistant, you should see each pack show up under the battery section. If you make any cabling or dip switch changes, ensure you press disconnect and connect in SolarAssistant to rescan available packs.