Preparing your device
Overview
This guide is for users that already have a supported Raspberry or Orange PI and would like to load SolarAssistant on it. If you purchased a device with software you can skip this article and continue with the WiFi or ETH cable setup steps.
Step 1 - Download SD card image
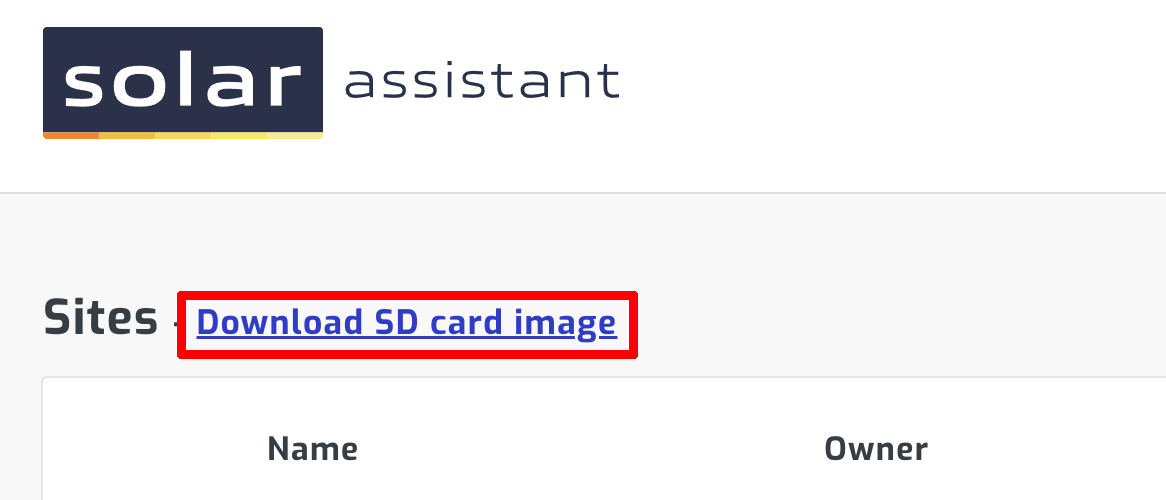
You can download the SD card image on the sites page. It will require registration if you aren't already registered.
Step 2 - Install SD card writing tool
Download and install the latest Raspberry PI imager:
 Download Raspberry PI Imager for Windows
 Download Raspberry PI Imager for macOS
 Download Raspberry PI Imager for Ubuntu
Step 3 - Flash SD card
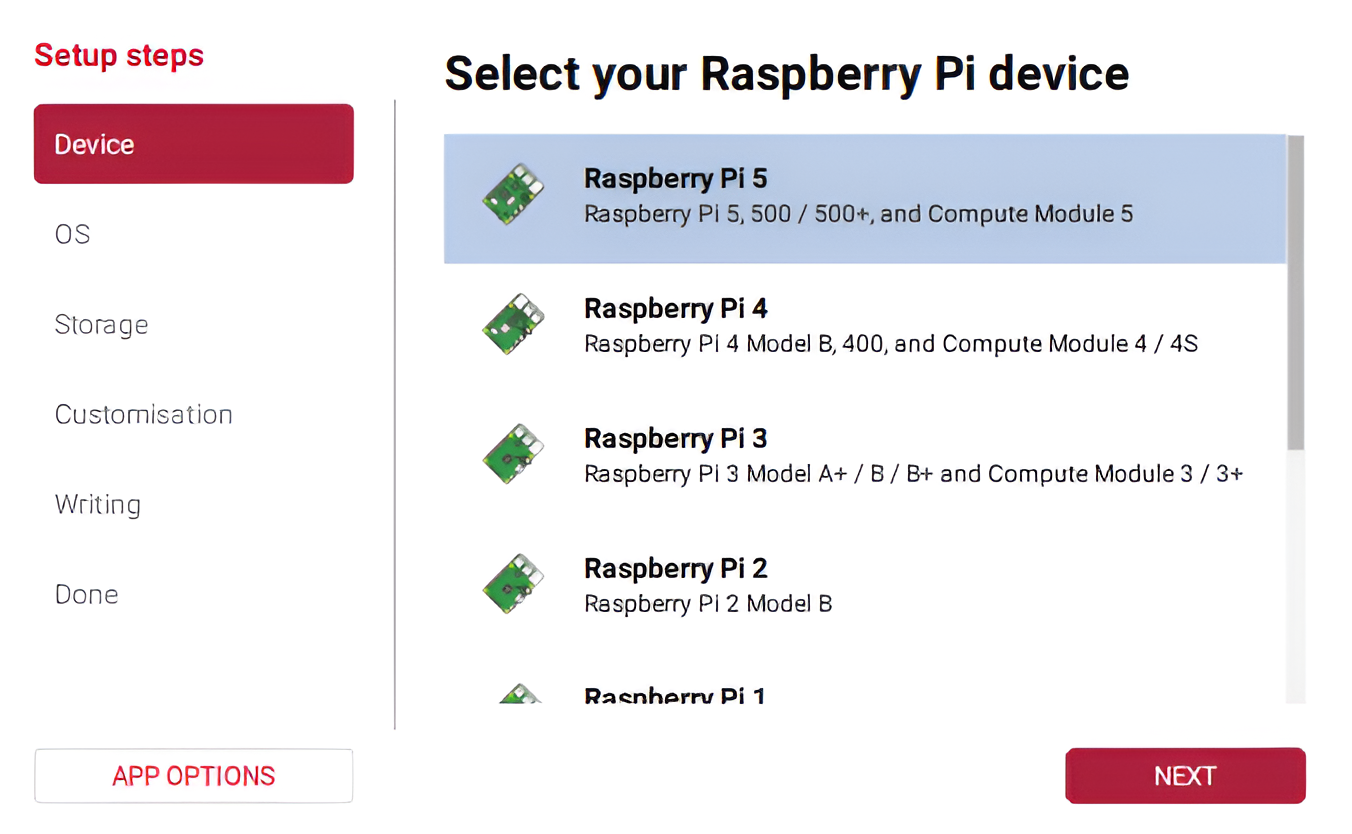
Start the Raspberry PI imager and select your Pi device type.
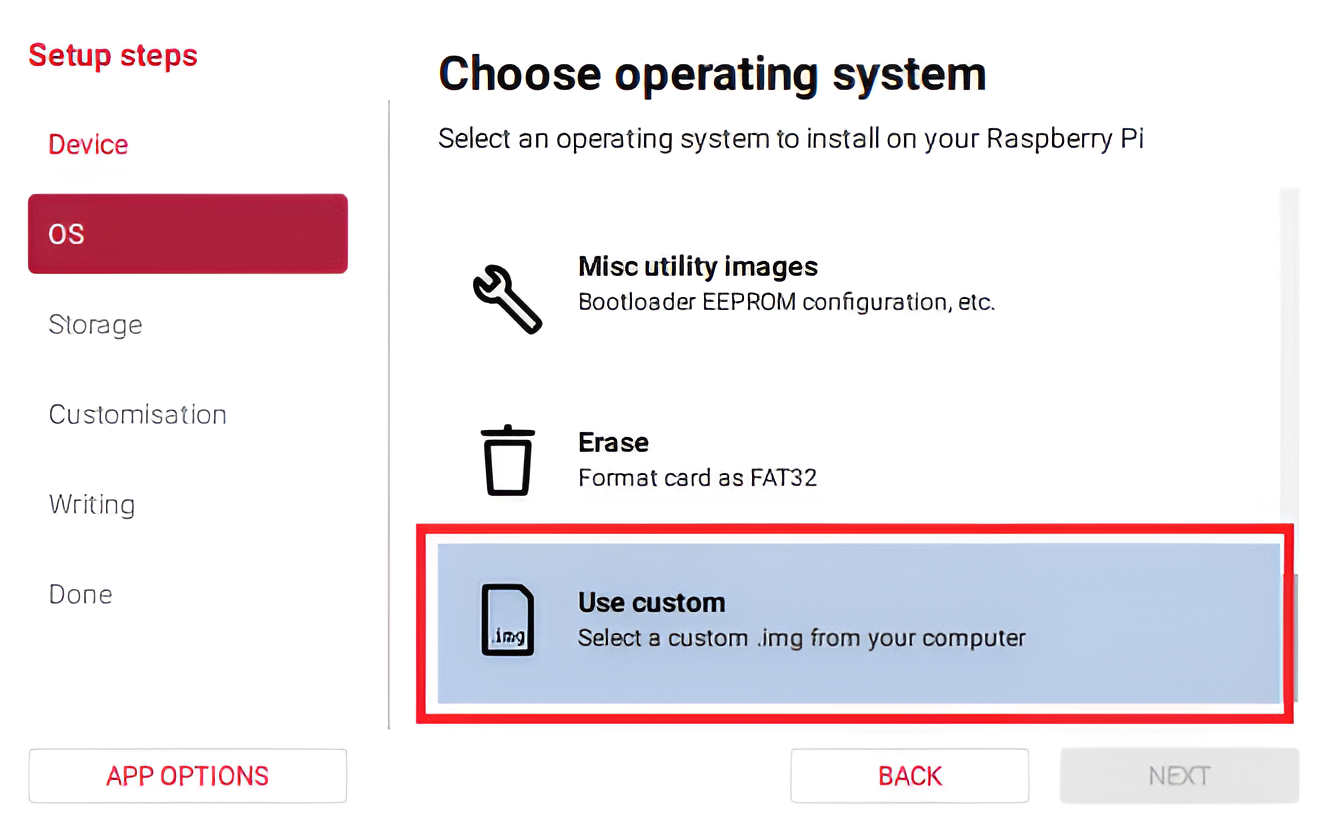
For the next step, scroll to the bottom of the image list and select "Use custom". This will prompt you to navigate to and select the image downloaded in step 1 as shown below.
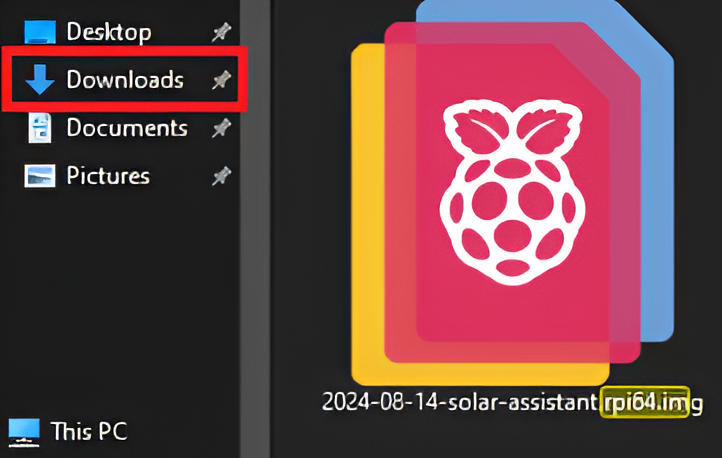
NB: Do not flash the downloaded ZIP file. Extract it and flash the ".img" file inside it as shown below.
Then, you will need to select the storage device you would like to flash the image onto.
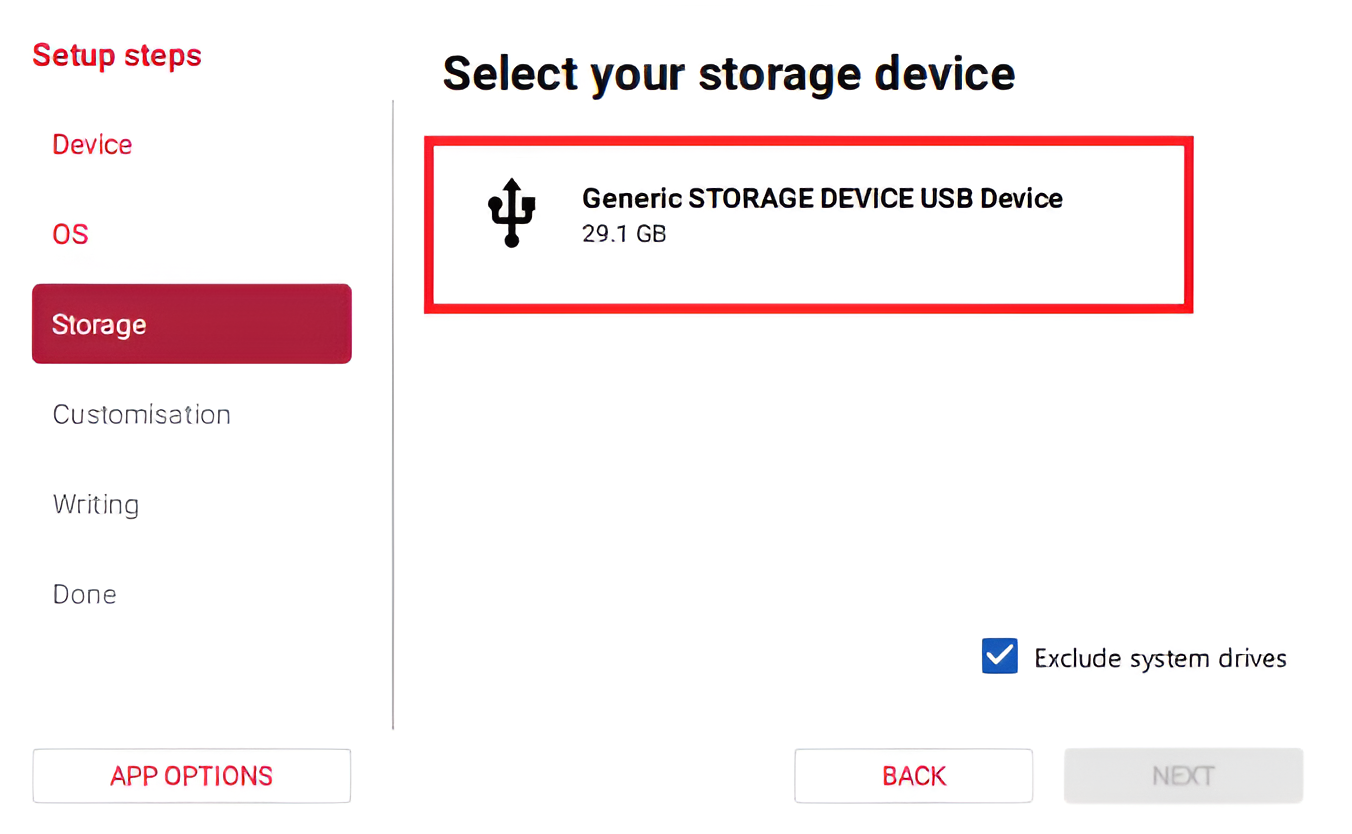
Tip: You can select an SSD instead of an SD card if you prefer to run SolarAssistant from an SSD.
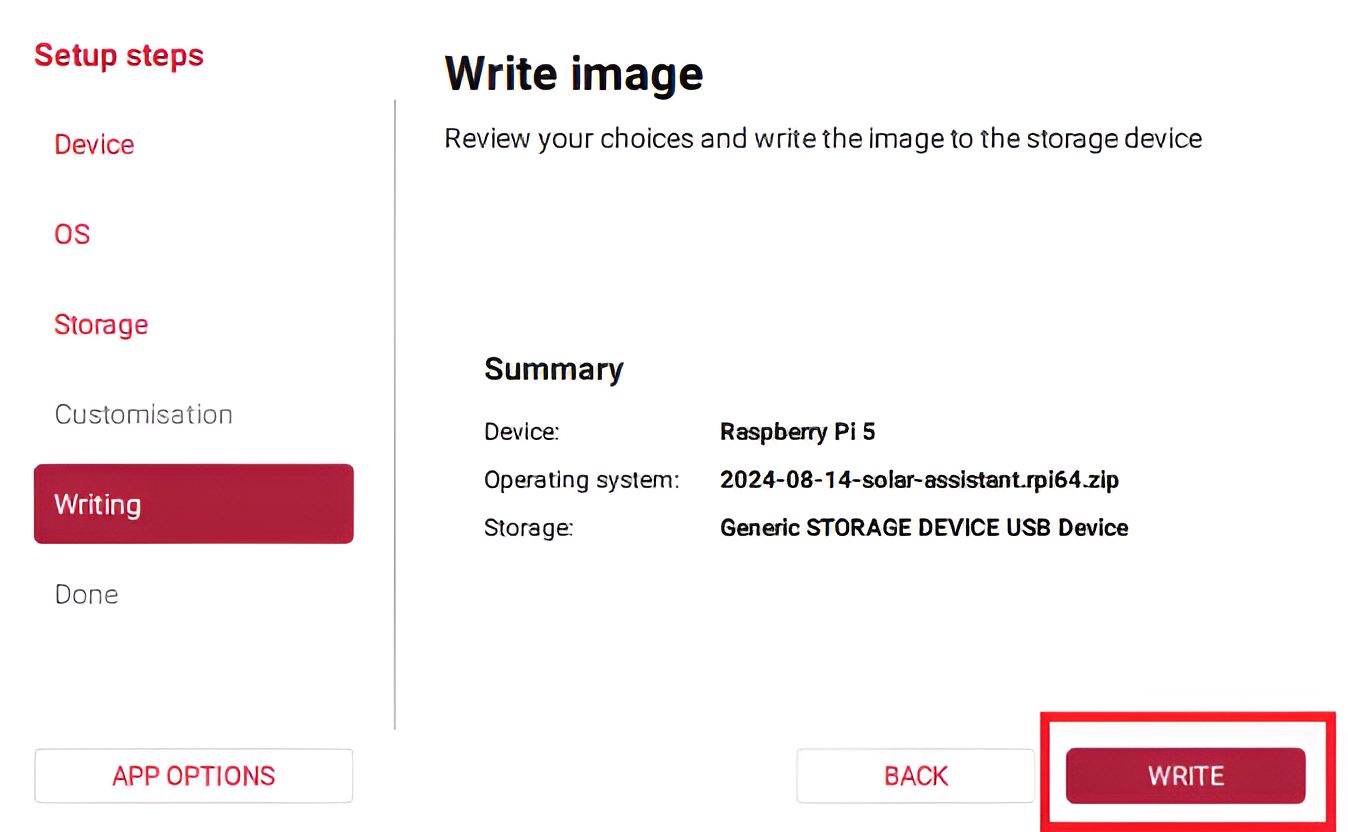
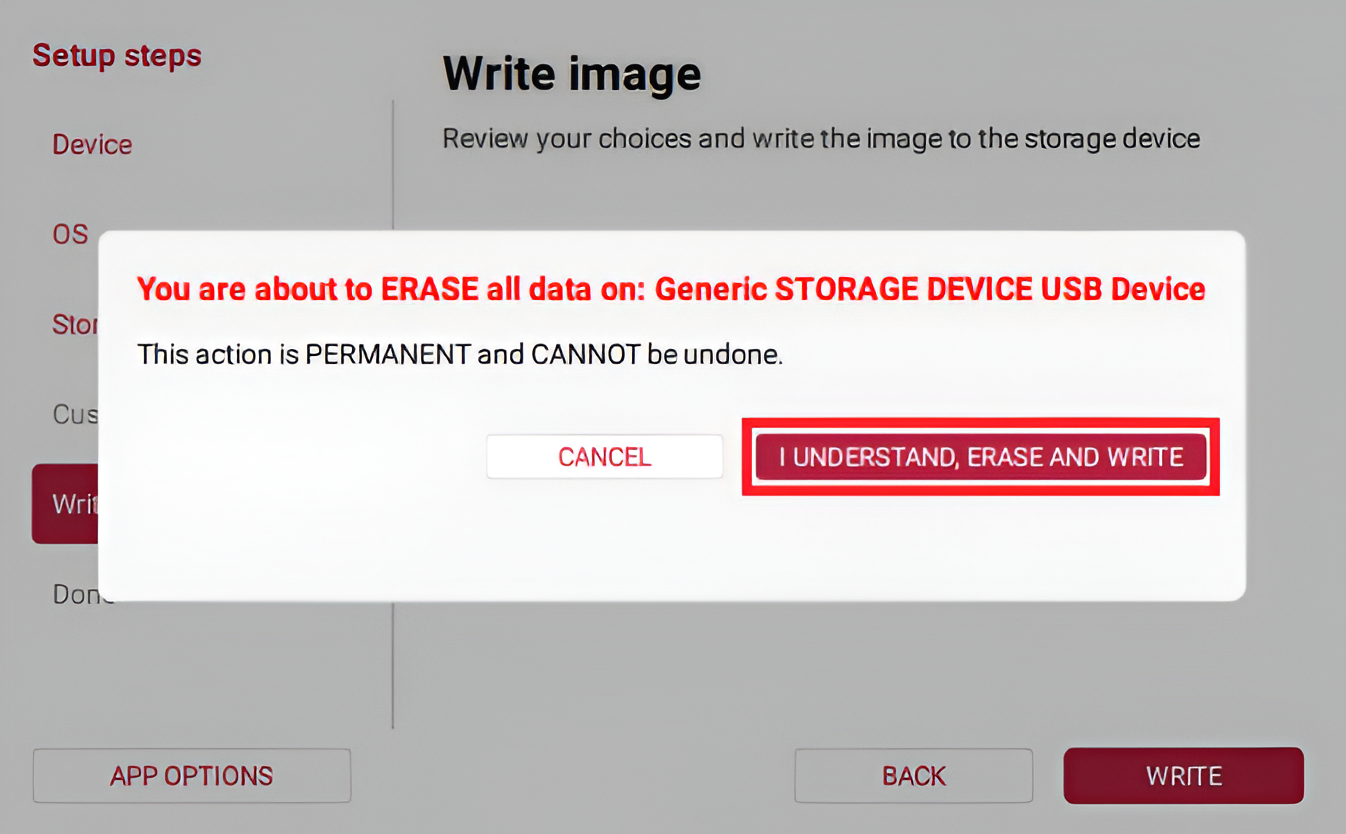
Lastly, you will need to click "write" to start the flashing process. You will then have to accept that the SD card will be erased and all data will be lost.
Step 4 - Start monitoring device
Insert the SD card in the Pi and turn it on. You should see a WiFi hotspot named SolarAssistant appear, unless you have an ETH cable plugged in. Continue with one of the guides below:
Troubleshooting
Bulk flashing
You can read more about bulk flashing here.
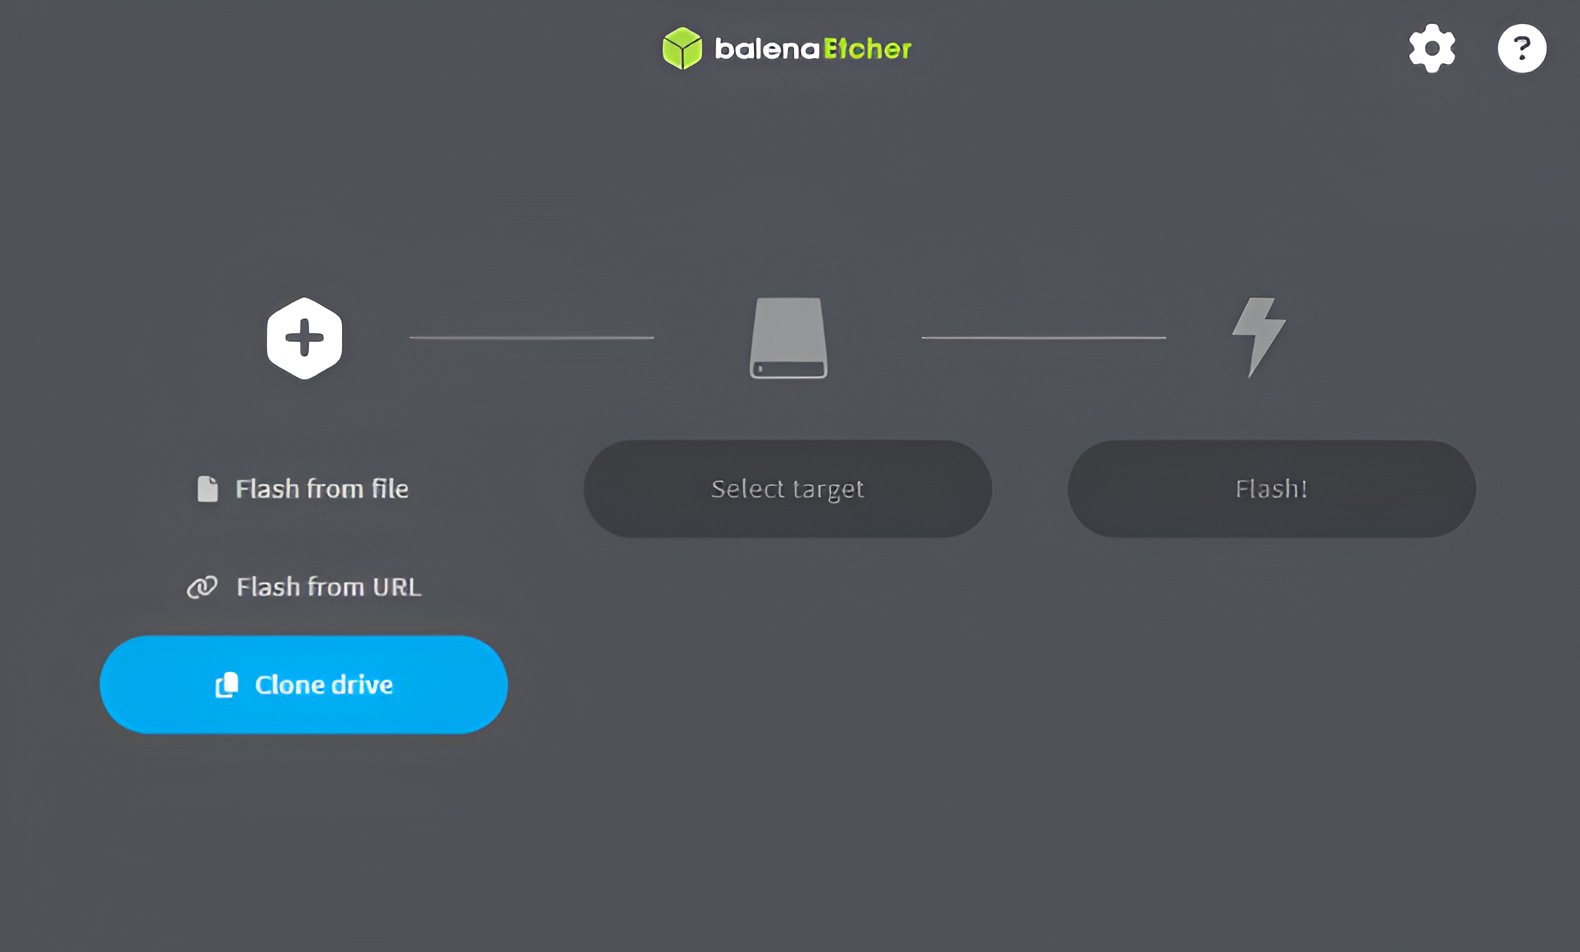
Cloning SD cards
This is something that is possible with Balena Etcher as shown below:
Alternative: Balena Etcher
You can also consider using an alternative tool to flash the SD card such as Balena Etcher. This is because this tool has a simpler interface and may be easier to use. It sometimes gives errors when selecting the image, but closing and reopening the tool can often resolve these issues.
Step 1 - Download SD card image
You can download the SD card image on the sites page. It will require registration if you aren't already registered.
Step 2 - Install SD card writing tool
Download and install the latest Balena Etcher.
Step 3 - Flash SD card
Start the Balena Etcher
For the next step, select "Flash from file" and select the image downloaded in step 1 as shown below.
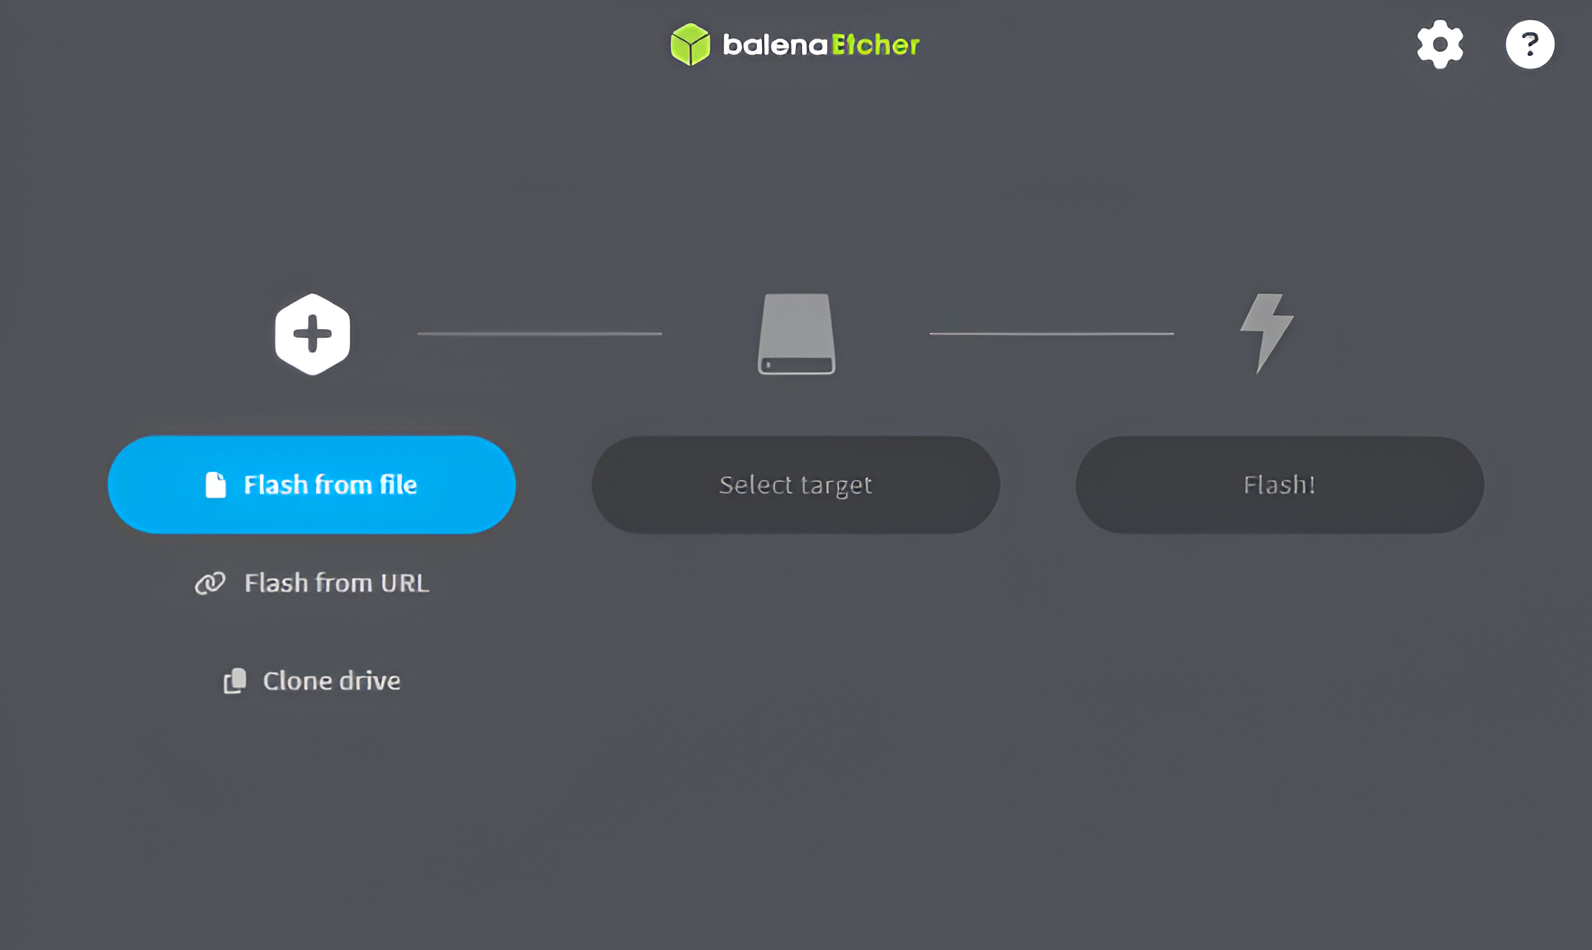
NB: Do not flash the downloaded ZIP file. Extract it and flash the ISO file inside it as shown below.
Then, you will need to select the storage device you would like to flash the image onto.
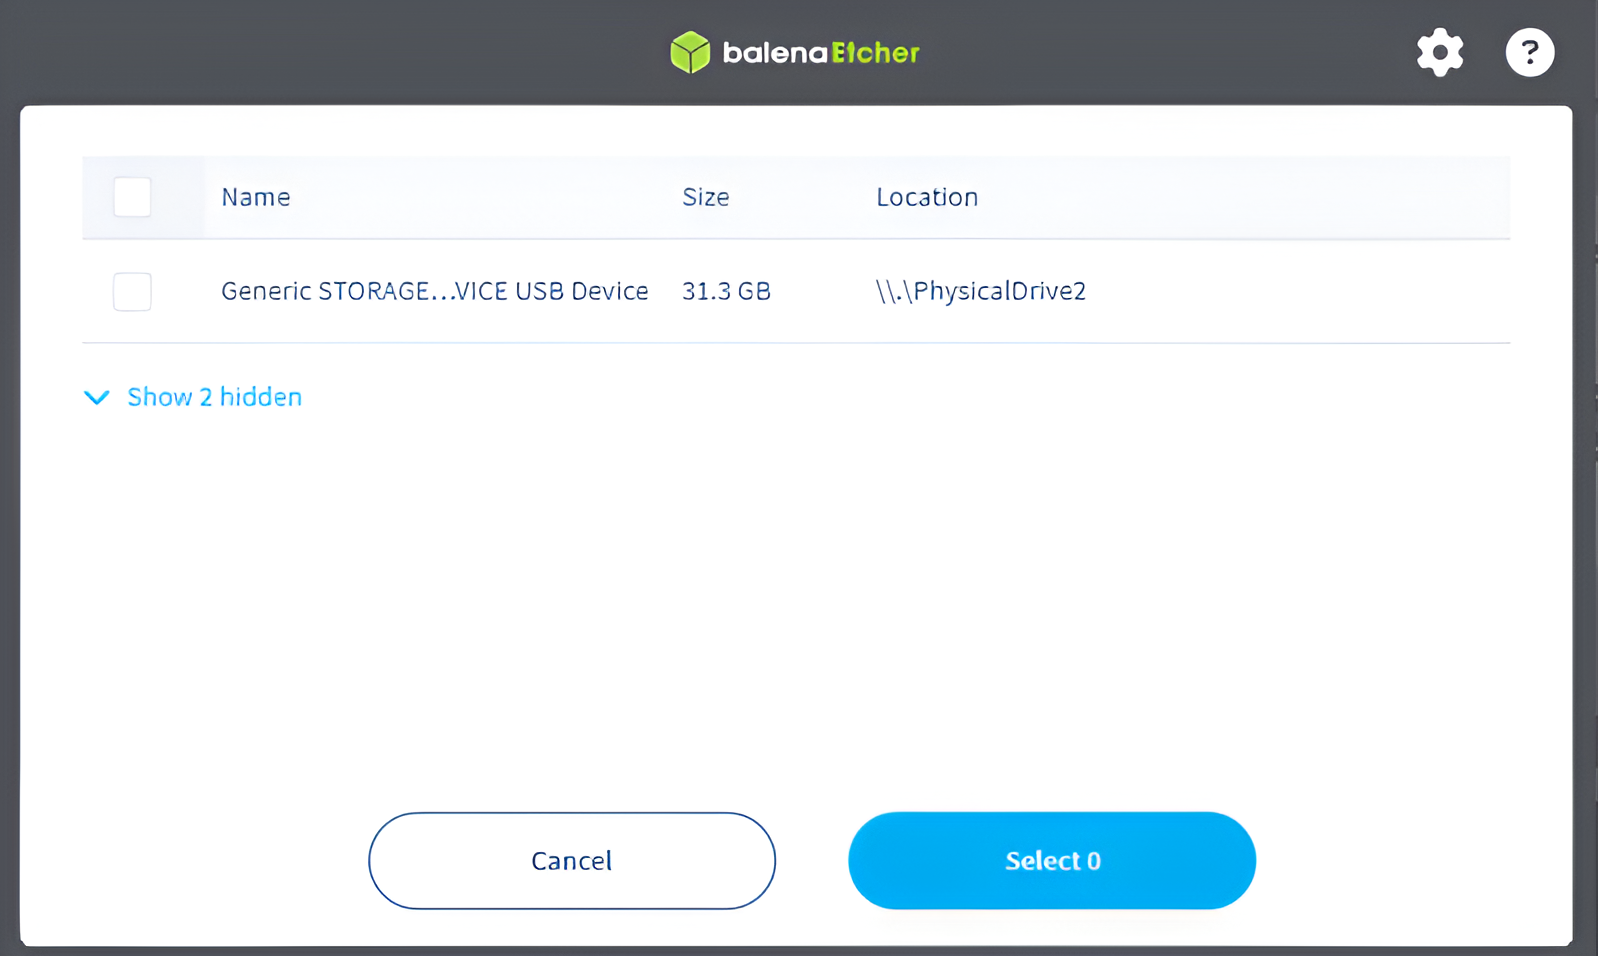
Note: Here you are able to select multiple storage devices at once, making it easier to prepare a large number of devices.
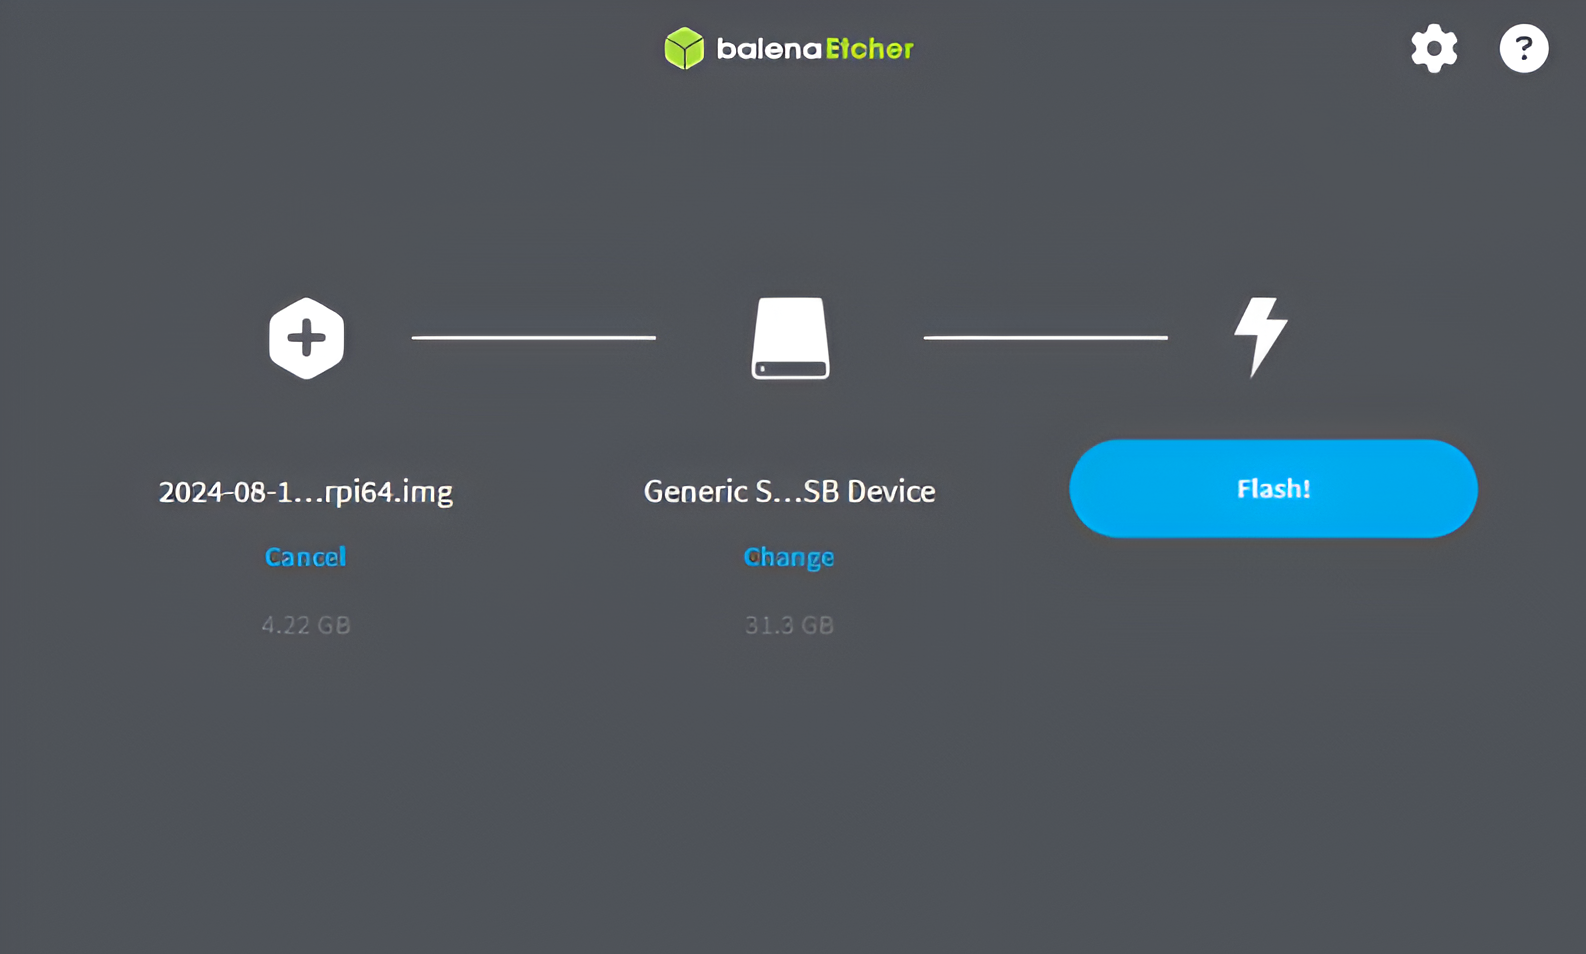
Lastly, you will need to click "Flash" to start the flashing process. You will then have to accept that the SD card will be erased and all data will be lost.
Step 4 - Start monitoring device
Insert the SD card in the Pi and turn it on. You should see a WiFi hotspot named SolarAssistant appear, unless you have an ETH cable plugged in. Continue with one of the guides below: