Fleet schedules
Overview
A fleet schedule lets you create a schedule in the cloud that your sites follow to adjust their settings. It is typically used for energy management, such as charging batteries when power is cheap and exporting when the grid needs it.
- Works offline. Sites fetch the latest schedule whenever they are connected to the internet, and keep following it while they are offline.
- Any inverter. The schedule only says what the fleet should do. An automation on each site turns that into the settings of its own inverter, so one schedule can steer a mix of inverter brands.
- A weekly schedule. Set a default schedule that every site on the fleet schedule follows, repeating every week.
- Overrides, fleet wide or per site. An override sets a different value for a set time, either immediately or scheduled for later, for all sites or only the sites you pick. You can send overrides from the website or from your own system through the API.
Step 1 - Create a fleet schedule
Open your user page, select your organization and open the Site config tab. Select New on the Fleet schedules card, enter a name and pick the time zone the schedule's times are in.
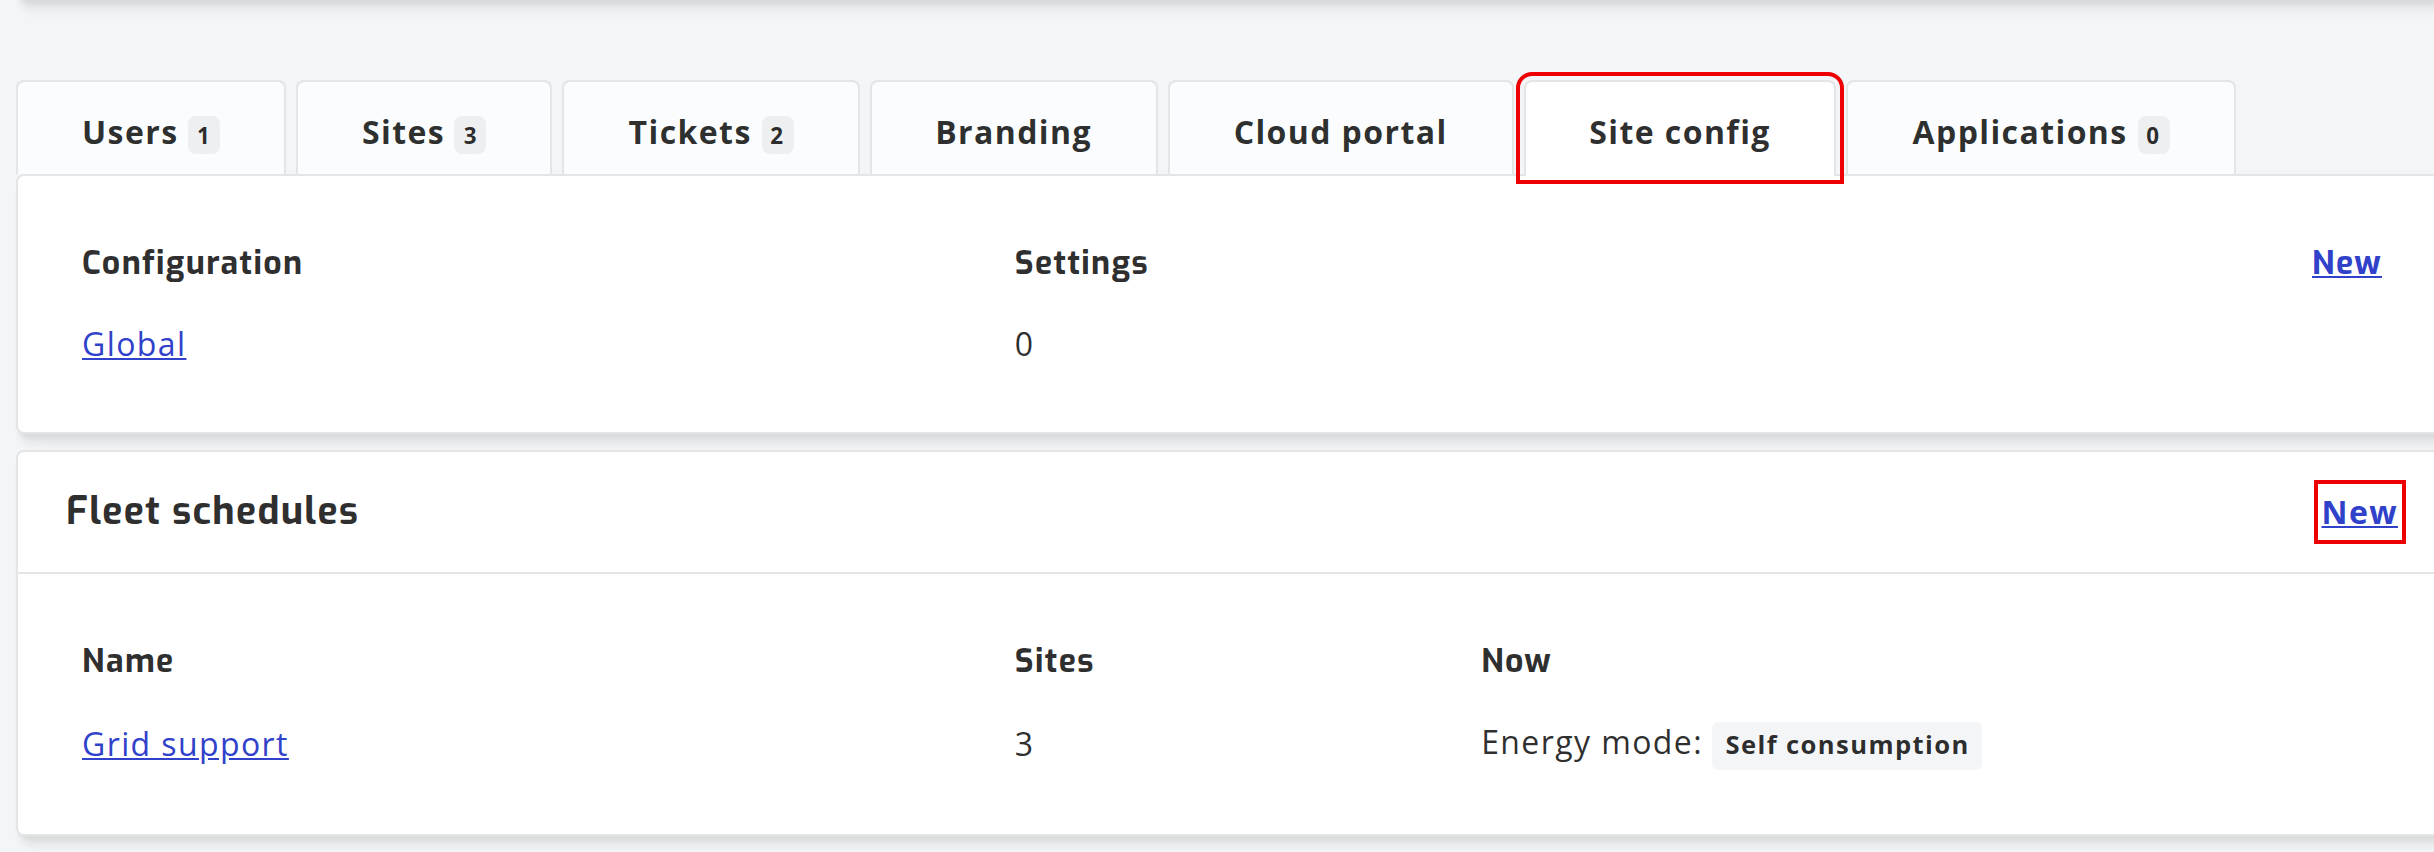
An organization can have several schedules, for example one per tariff or per customer programme. A site follows at most one schedule at a time.
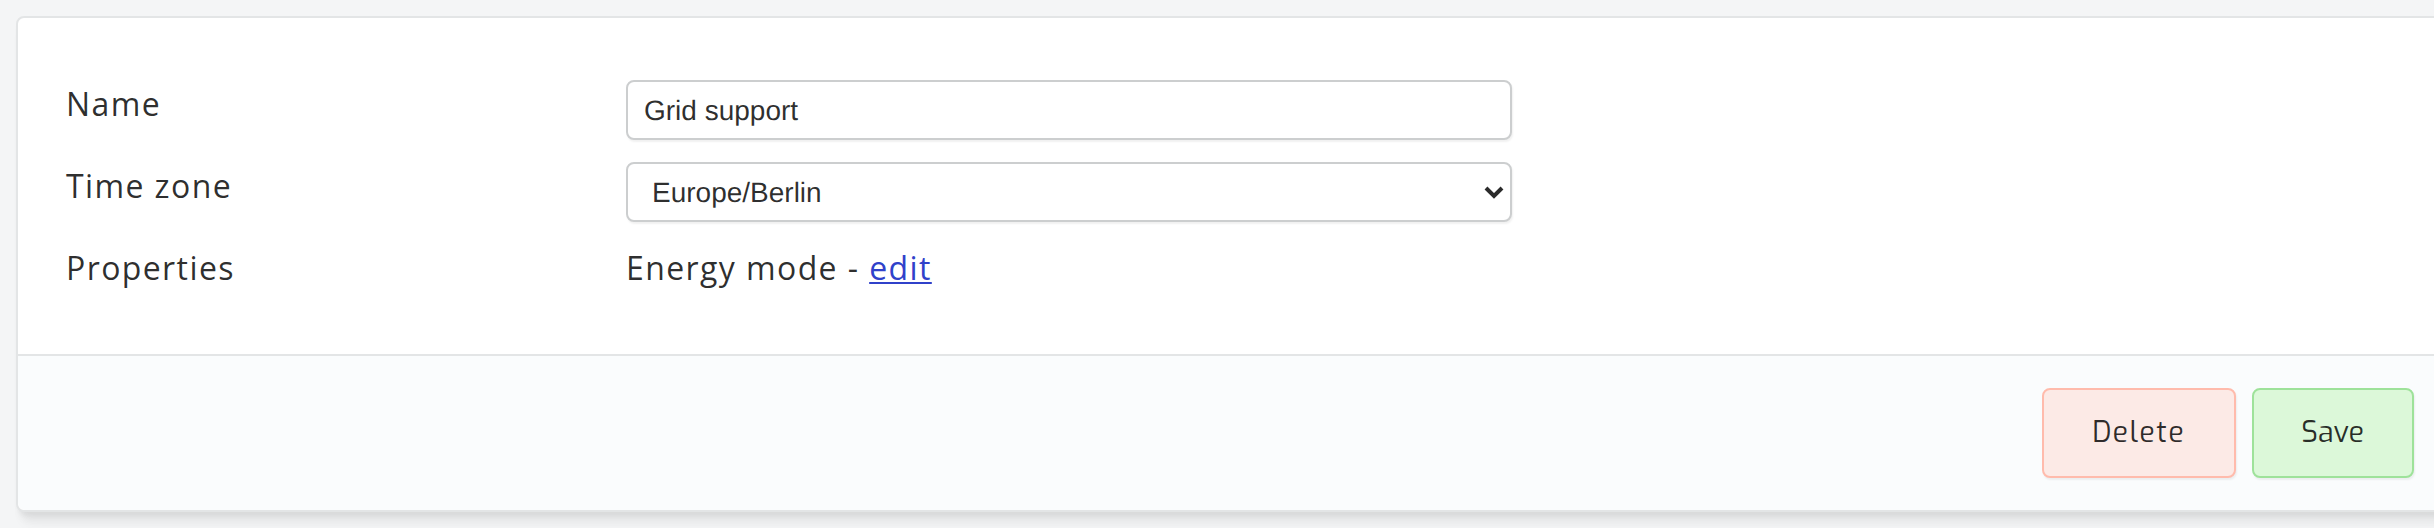
Step 2 - Determine property values
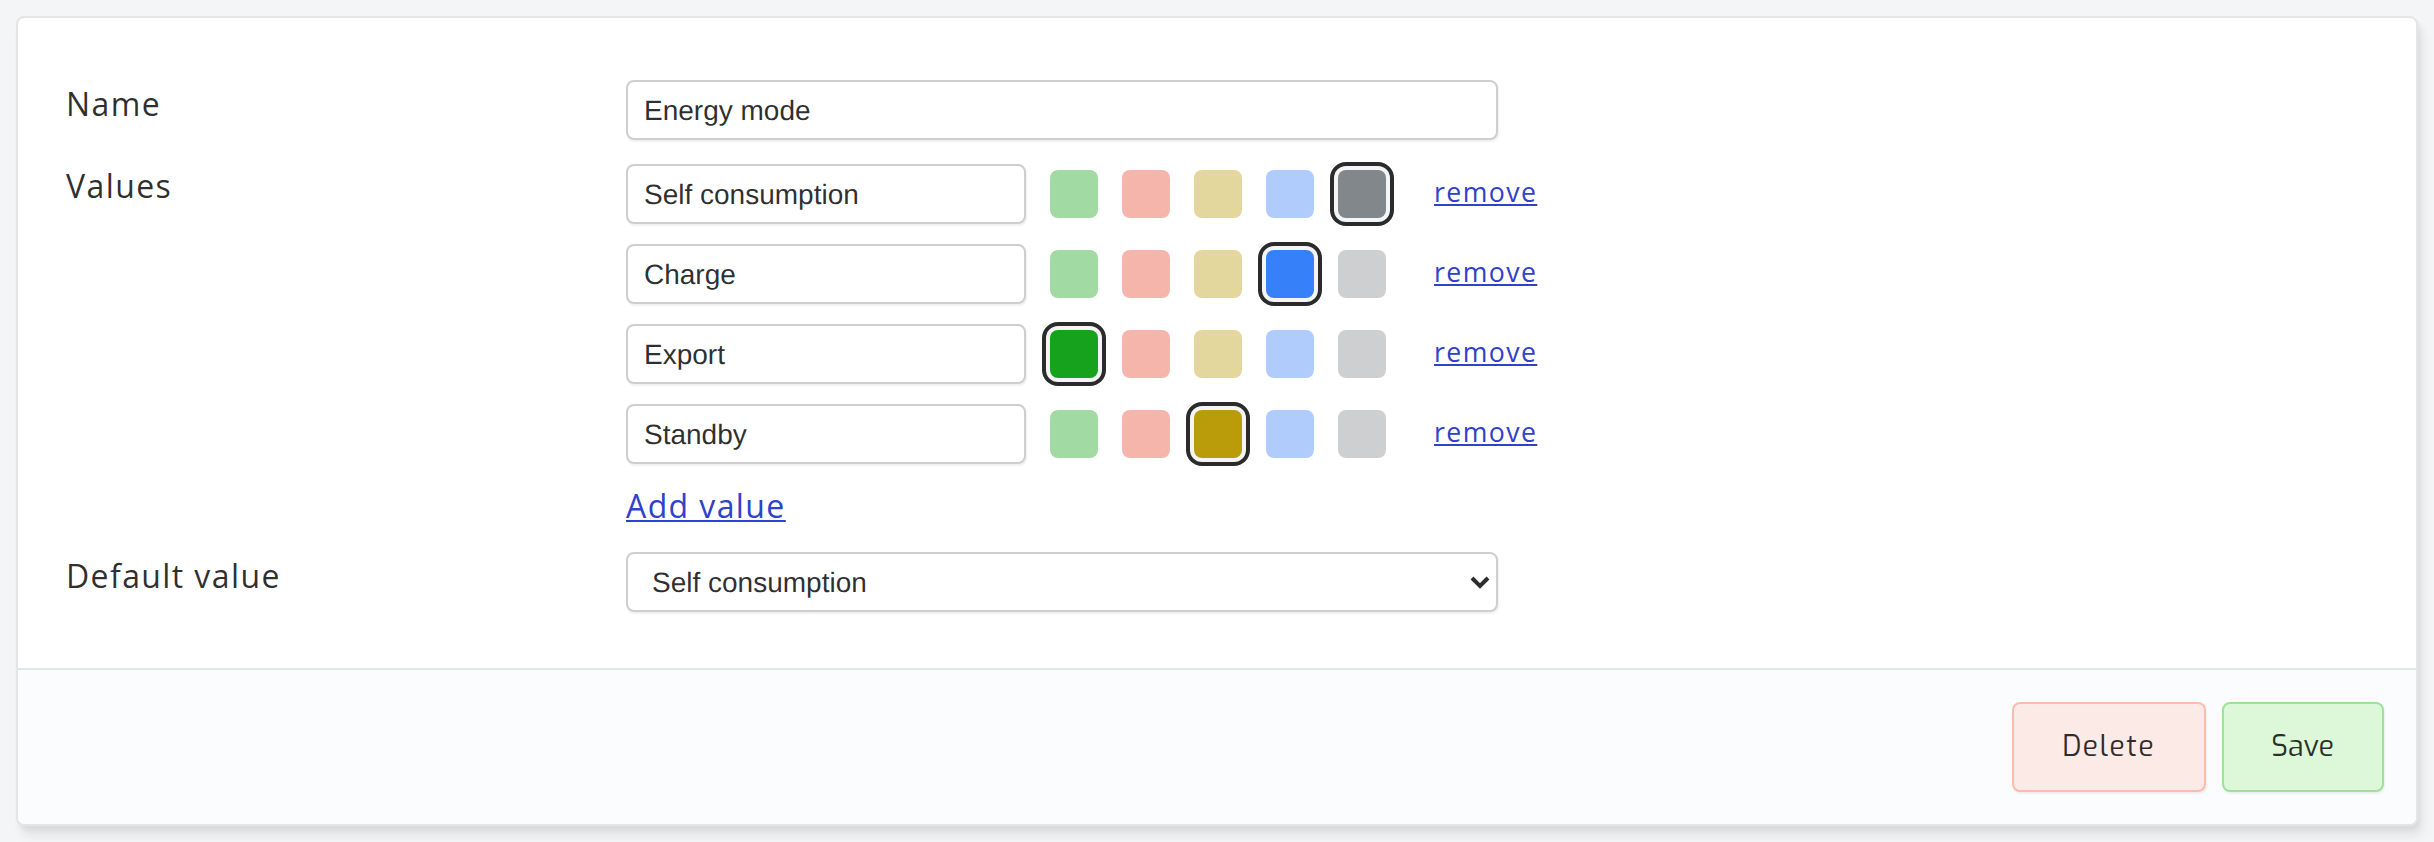
When a new schedule is created, a default property Energy mode is created with the values below, as energy management is the most common use of fleet schedules. Select edit next to Properties to rename them, add your own or pick their colours.
- Self consumption is the default: solar and battery serve the home and nothing is exported from the battery.
- Charge charges the battery, for example from the grid at night.
- Export discharges the battery to the grid.
- Standby holds the battery where it is.
The Default value applies whenever nothing else is scheduled. The values are only names: what each one does on a site is set by that site's automation in step 6.
Step 3 - Set a weekly schedule (optional)
You do not have to set a weekly schedule. A fleet schedule can work through overrides alone, which are commonly sent from your own system through the API. Without a weekly schedule, the default value applies whenever no override is running.
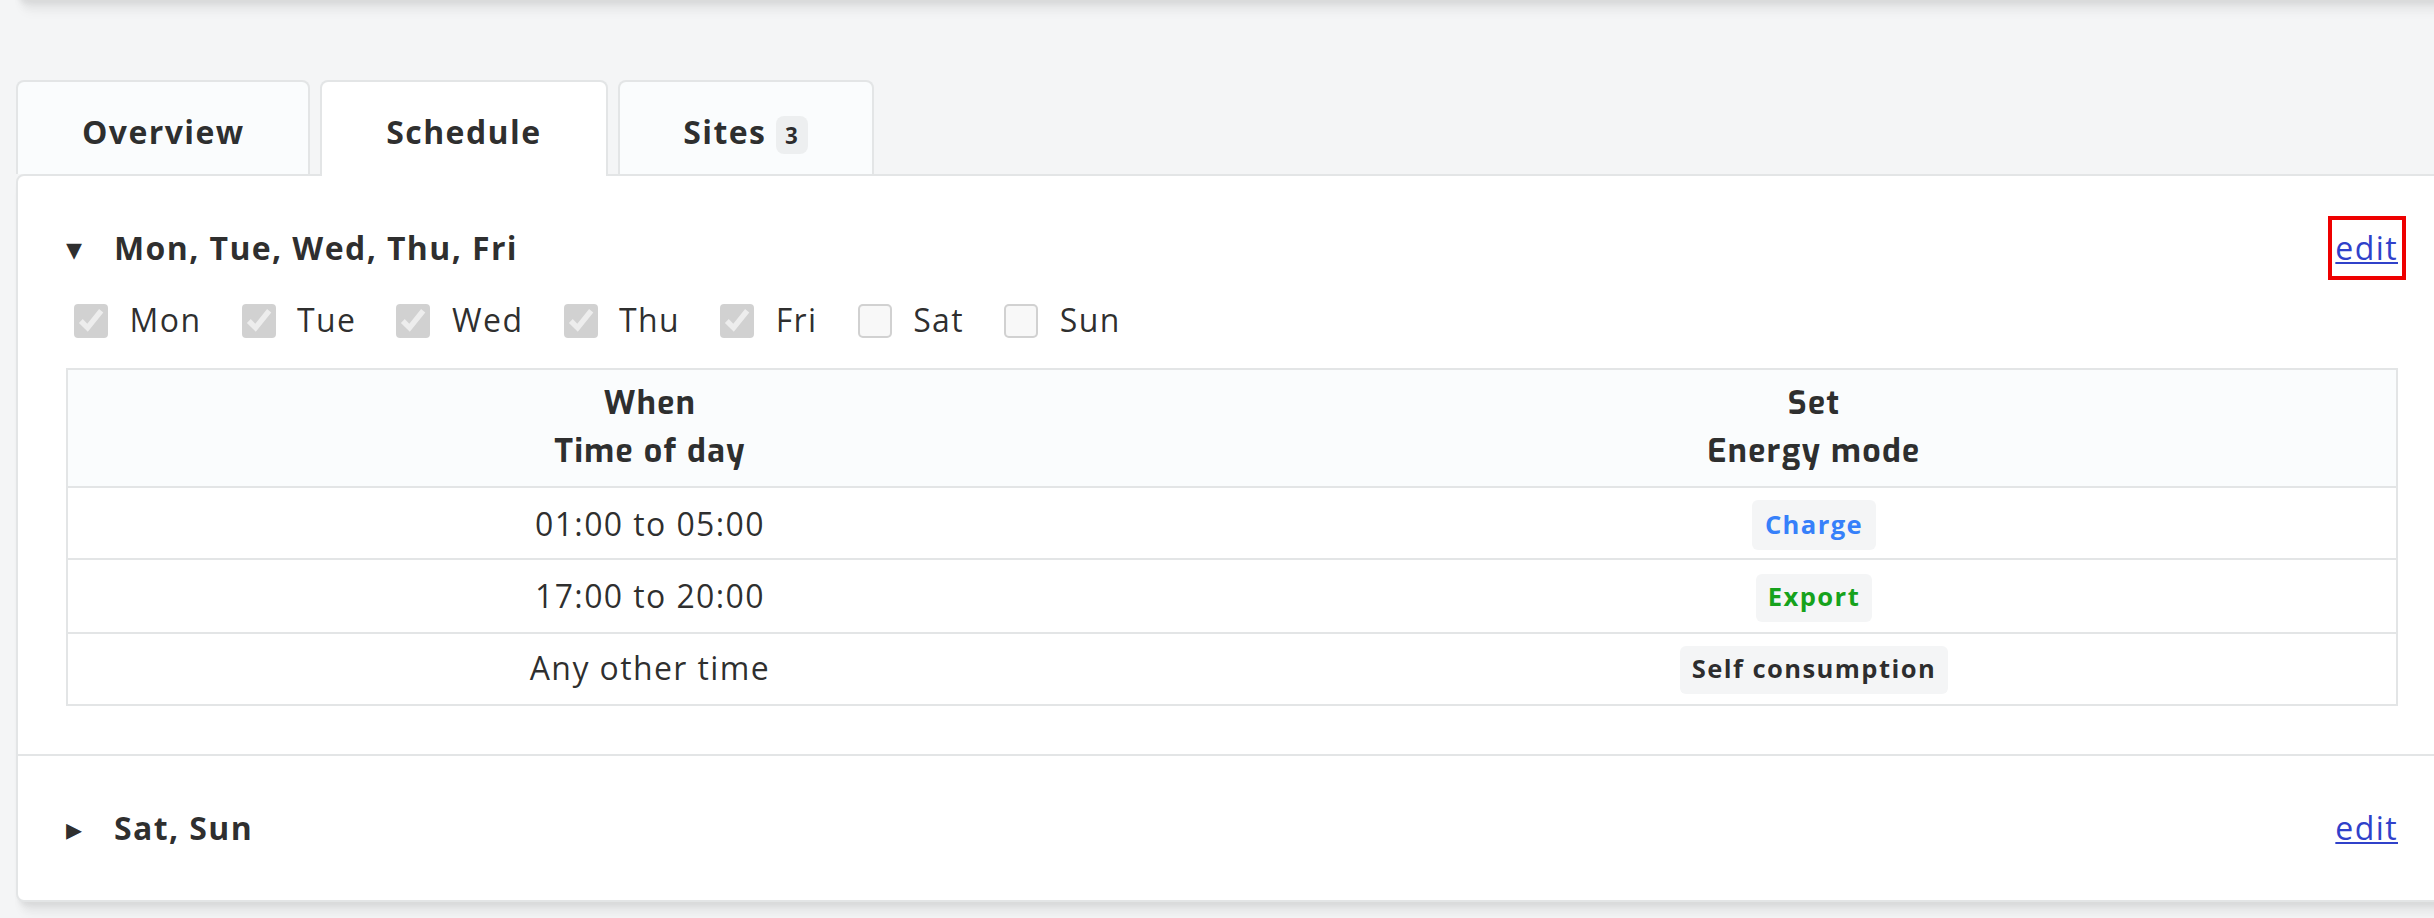
Open the Schedule tab. A new schedule has one section, All week. Select edit on a section to change its rows: each row is a time of day and the value that applies then. Outside the rows, the default value applies.
To give some days a different pattern, untick them and save. They move to a section of their own, which you can then edit. Ticking a day that belongs to another section moves it into this one, and replaces what was saved for it, after a warning.
Step 4 - Add your sites
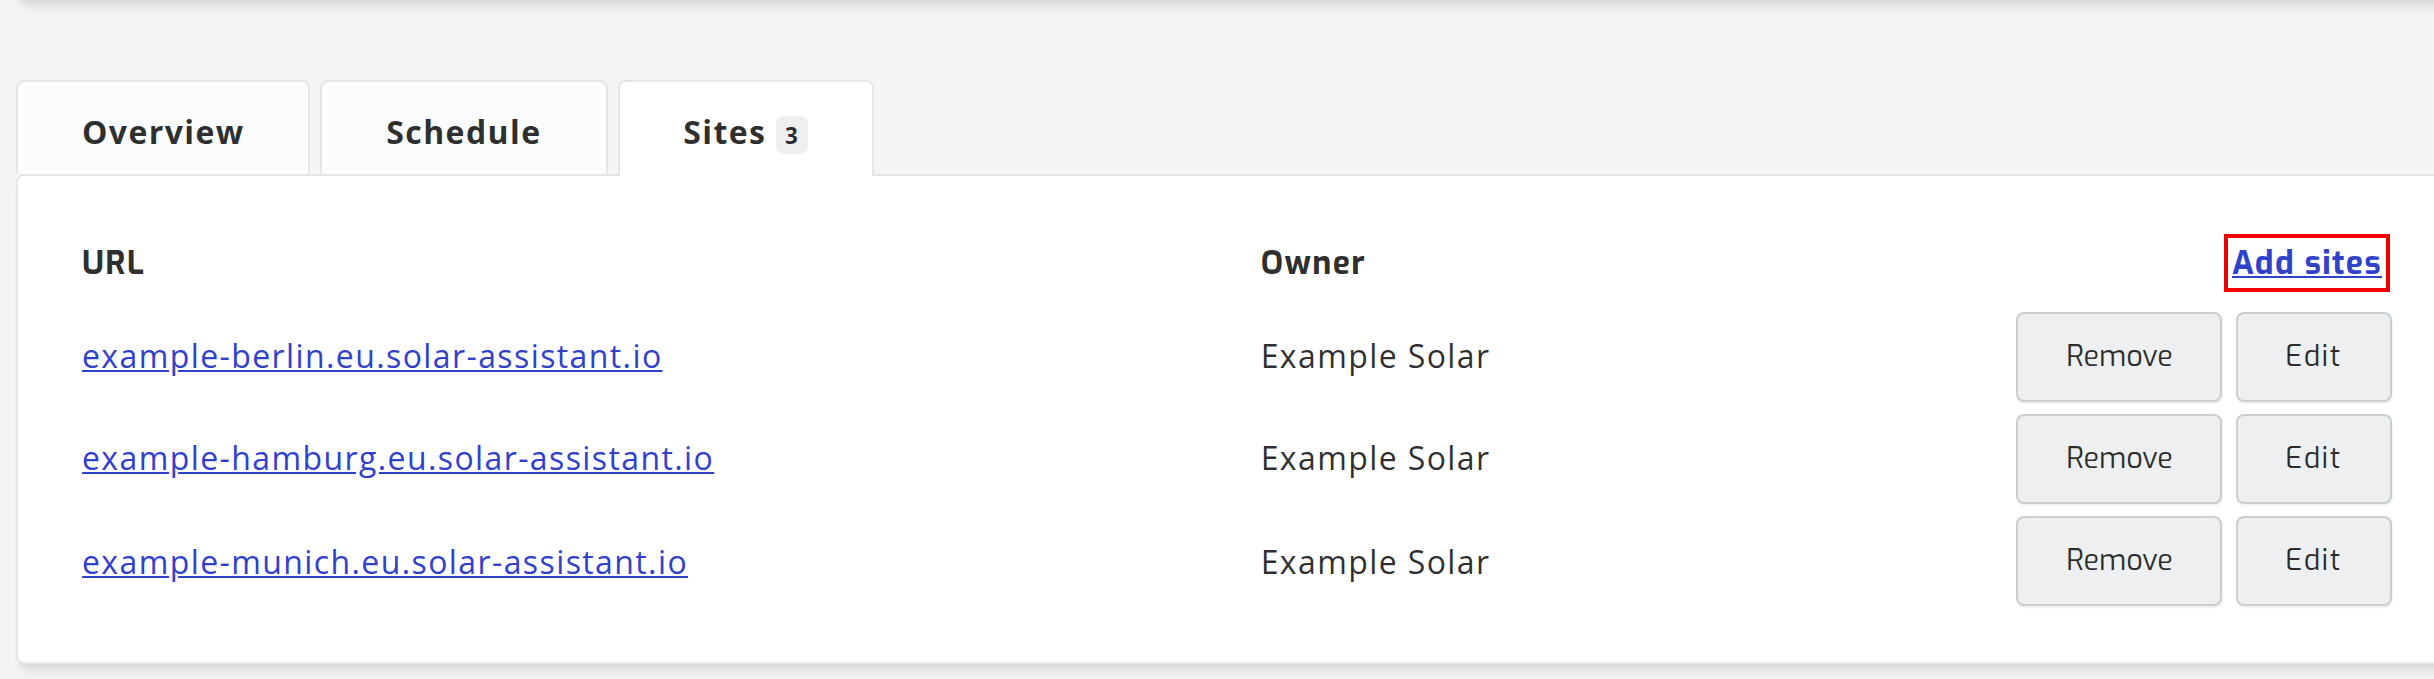
Open the Sites tab and select Add sites to search the sites of your organization and add them. A site that already follows another schedule moves to this one.
Step 5 - See what is coming and send overrides
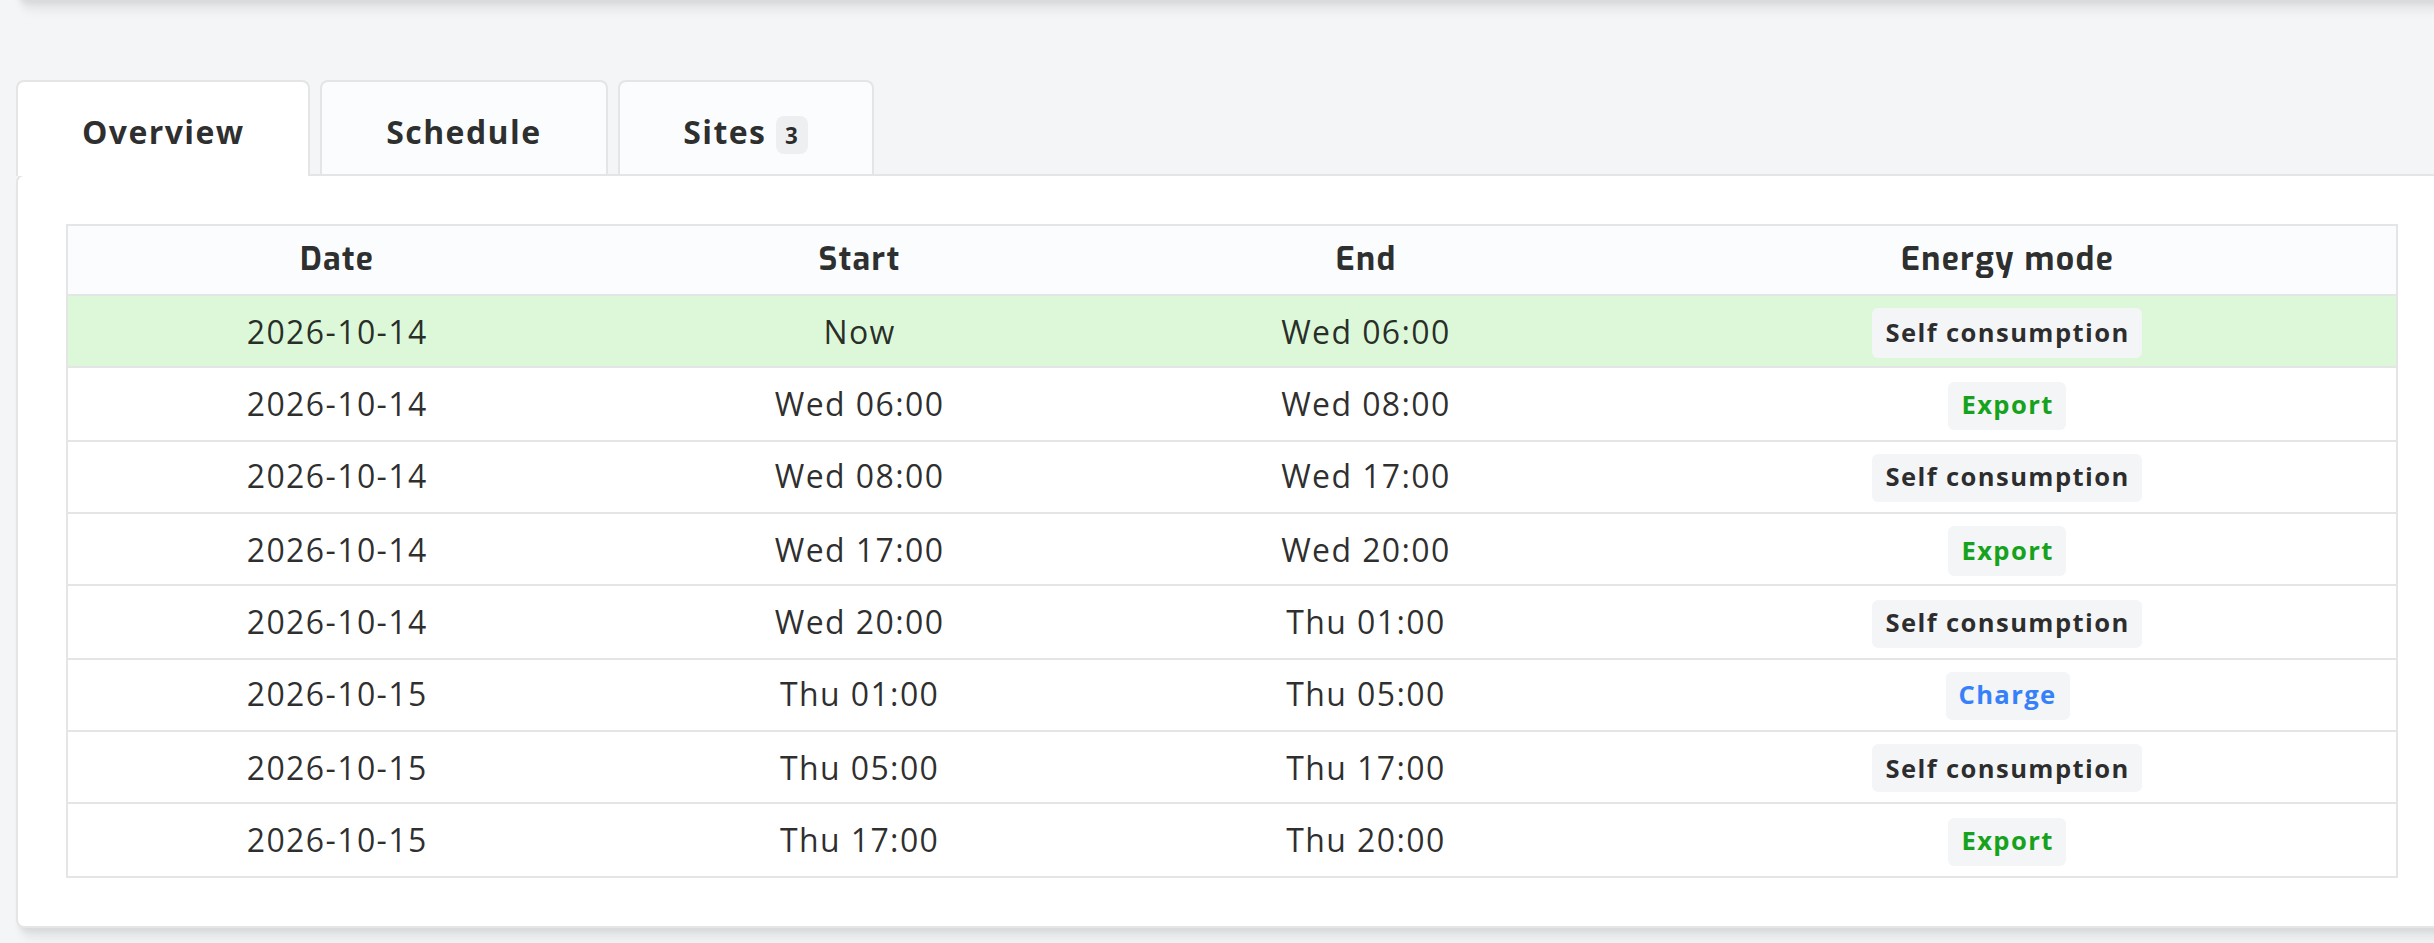
The Overview tab lists the values for the coming days, with the current one highlighted. Below it are the overrides that are running or still to come.
Select New on the Overrides card to send a command. Pick the value, when it starts and how long it lasts, and whether it applies to all sites or only to the sites you tick. An override aimed at particular sites wins over one for all sites, so a fleet-wide command does not undo it.
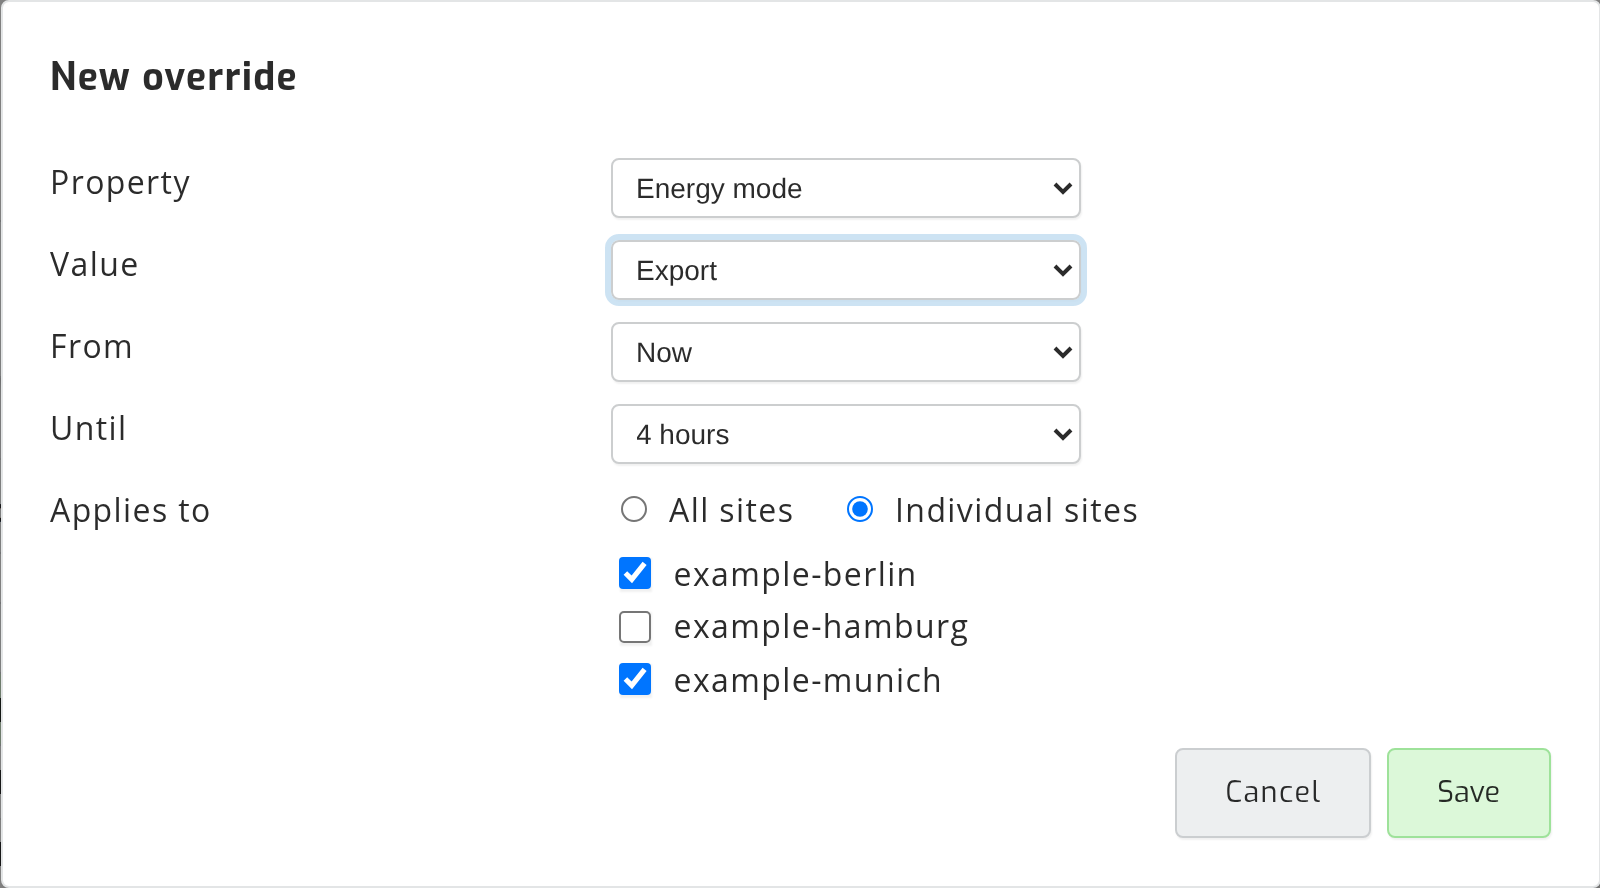

Every override has an end, so a forgotten command cannot hold your fleet in one state. When it ends, the weekly schedule takes over again.
Step 6 - Map each value to inverter settings
On the site, the schedule shows as a value called Energy mode. Add a rule table that sets the inverter settings you want for each value. In this example, Export sets the work mode to Selling first and every other value sets it back to Zero export to CT.
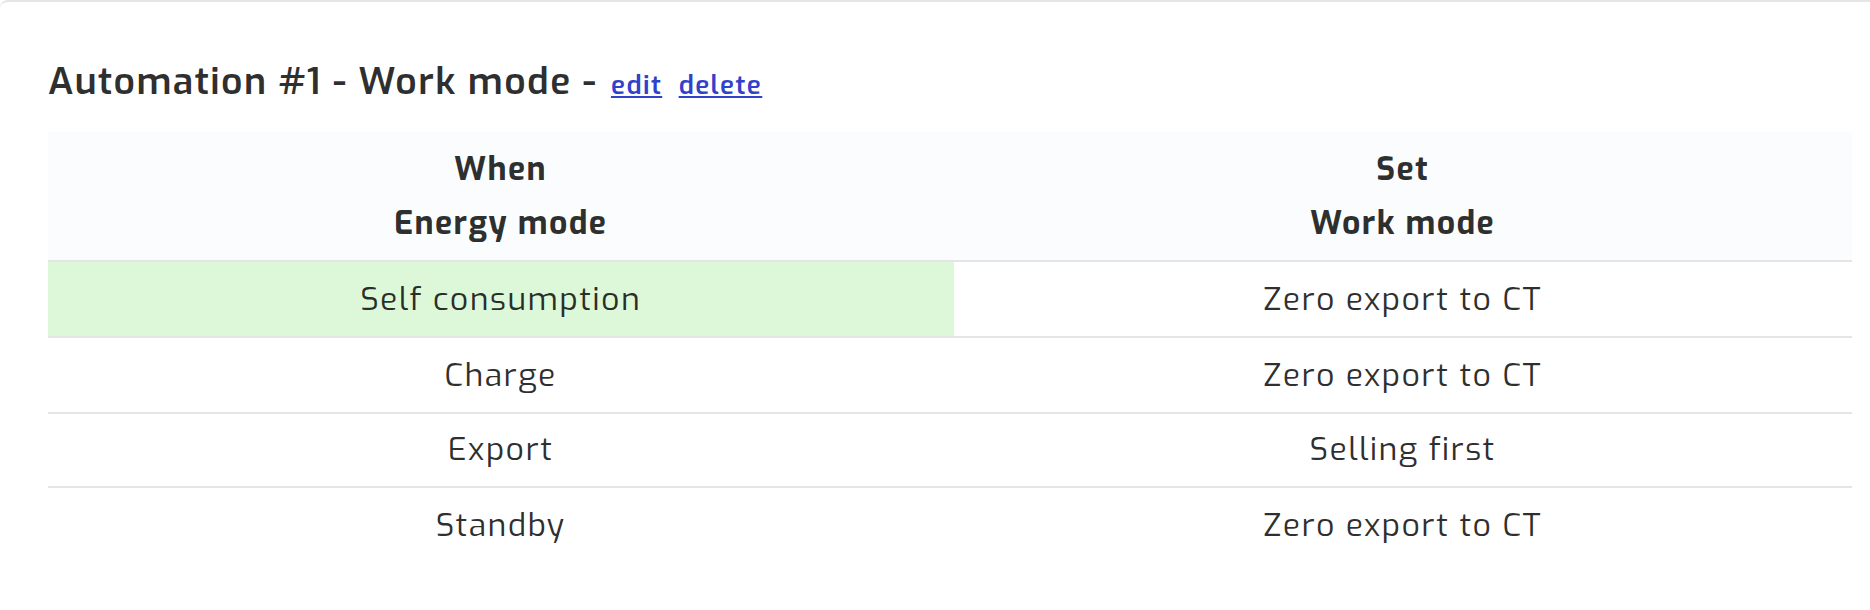
A rule table can set any inverter setting the site supports, and a site can have several, for example one for the work mode and one for grid charging. A value that no row matches changes nothing.
Step 7 - Control via API (optional)
Everything on these pages can also be done through the SolarAssistant cloud API with an organization token. Most integrations only send overrides: one request per command, with the value, the start (optional, now if left out), the end and optionally the sites it applies to.