Connecting a SolarMD battery
Overview
SolarAssistant can be connected to a SolarMD battery via the battery CAN2 port. One advantage of CAN bus is that if a device is already reading your battery, SolarAssistant can "listen in" on the communication without affecting it.
Please note: you may need to set the battery to Sunsynk mode. We would recommend doing this with the help
of the installer or manufacturer. Otherwise, you can do it yourself, to set to Sunsynk mode, follow these
steps:
- Hold in the push button until LED 4 flashes
- Let go
- Give short presses until LED 1 and 2 are orange
- Hold in for 2 seconds to select
- Give short presses until CANBUS 2 LED is GREEN
- Hold the push button for 2 seconds to select
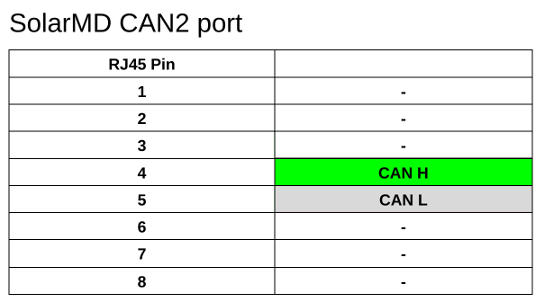
USB cable and pinout
You will need to SolarAssistant CAN bus USB cable or alternatively the Seeed Studio CAN Analyzer. Crimp the cable into an RJ45 plug with the pinout below.
Protocol selection
On the SolarAssistant configuration page, select the protocol below.

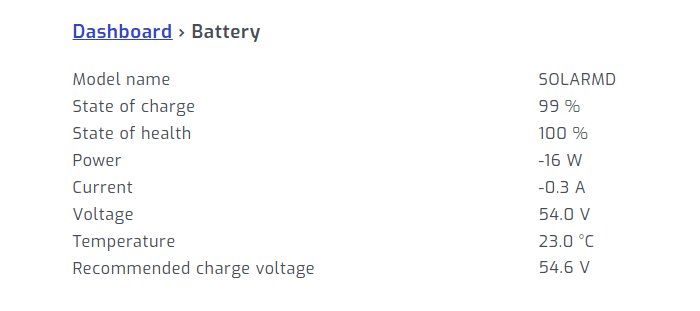
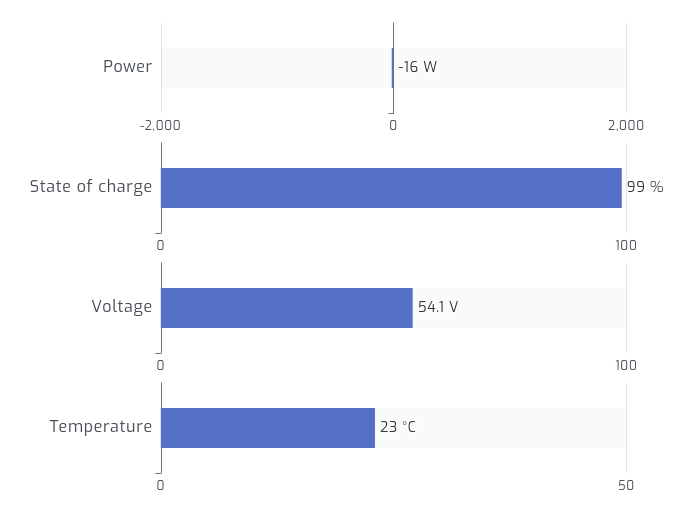
Result
When multiple batteries are connected in parallel they will display as one large battery. Per pack metrics via CAN bus might be available in future.
Troubleshooting
Please note, the following it not related to SolarAssistant. This is just a general troubleshooting guide for the
SolarMD battery. If you are having issues with the batteries, you may want to contact the manufacturers or
installer. If the batteries have run flat and are unresponsive, or if you are having difficulties with the
batteries, use the following steps to put the battery in Override mode:
- Press and hold the push button until LED 6 starts flashing
- Release the push button
- Press the push button again
- Release the push button
This will place the battery into Override mode. Once Override mode has been activated, please proceed with charging the battery.