SSH access
Overview
SSH access is intended for technical users to gain root access to the underlying Debian linux operating system that SolarAssistant runs on. The steps below are for connecting on your local network. To connect from anywhere, see the remote SSH access page.
Step 1
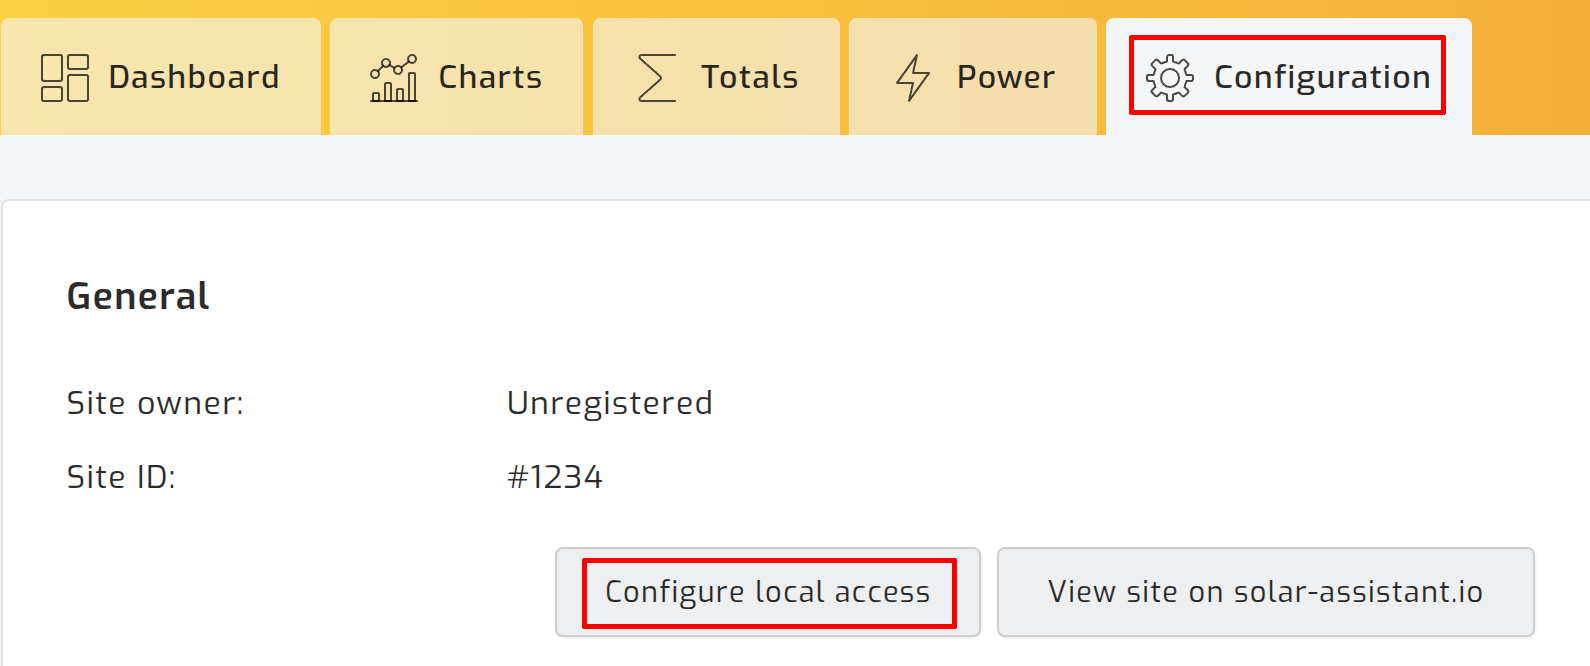
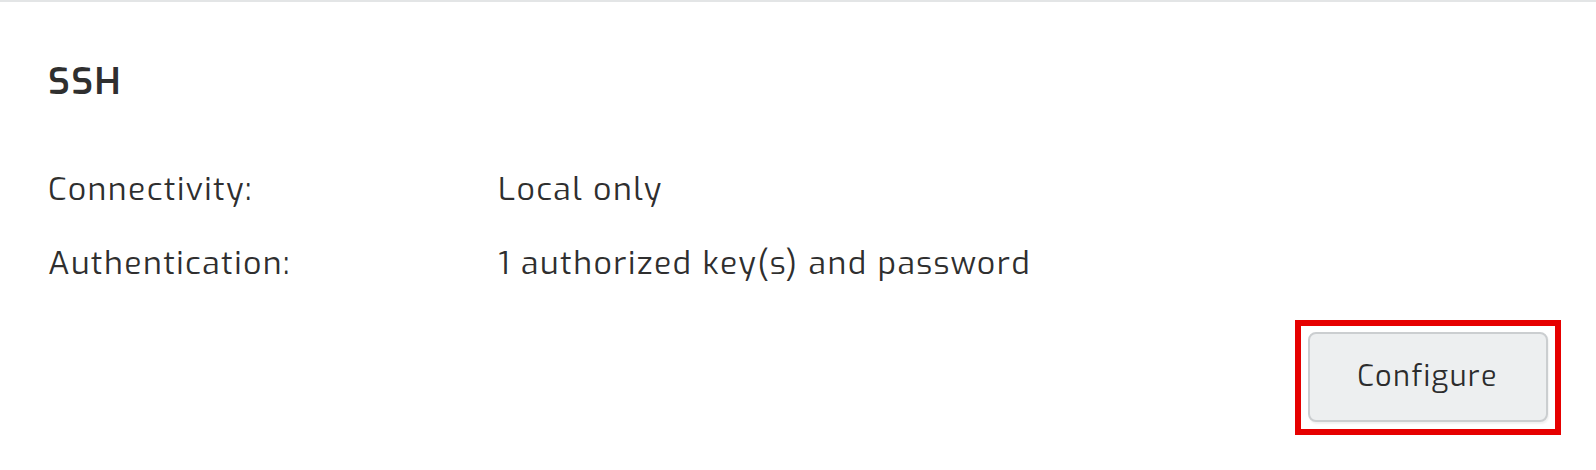
Navigate to the "Configuration" tab and select "Configure local access". In the "SSH" section, click "Configure" - every SSH setting and the list of keys live on that page.
Step 2
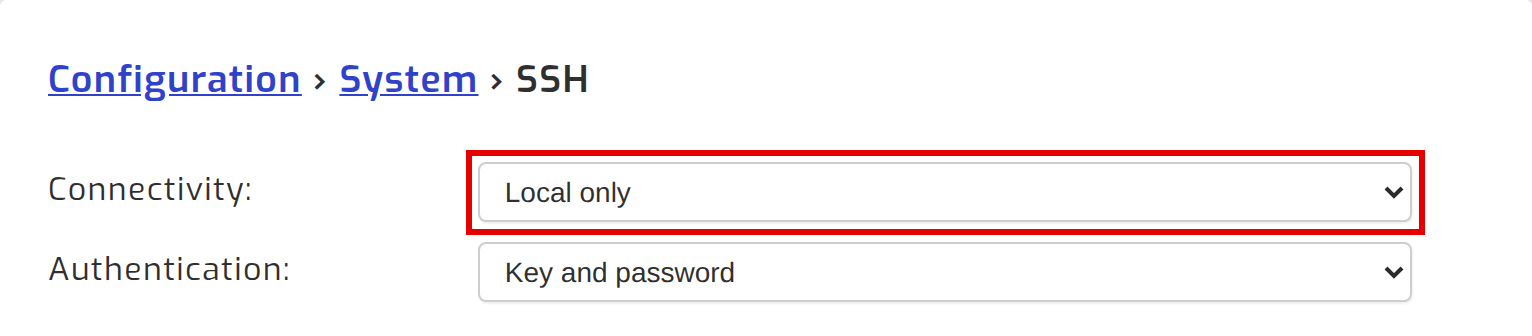
Set connectivity to "Local only" and click save.
Step 3a - Connect via password
Set authentication to "Key and password" and click save.

Connect with the command shown under usage instructions:
ssh solar-assistant@192.168.1.100Log in with the default password below if you have not changed it:
Username: solar-assistant
Password: solar123
A new device has SSH enabled with these credentials until you click "Accept and agree" on the welcome page during the initial setup, after which it is disabled for security reasons and steps 1 and 2 enable it again.
Step 3b - Connect via key
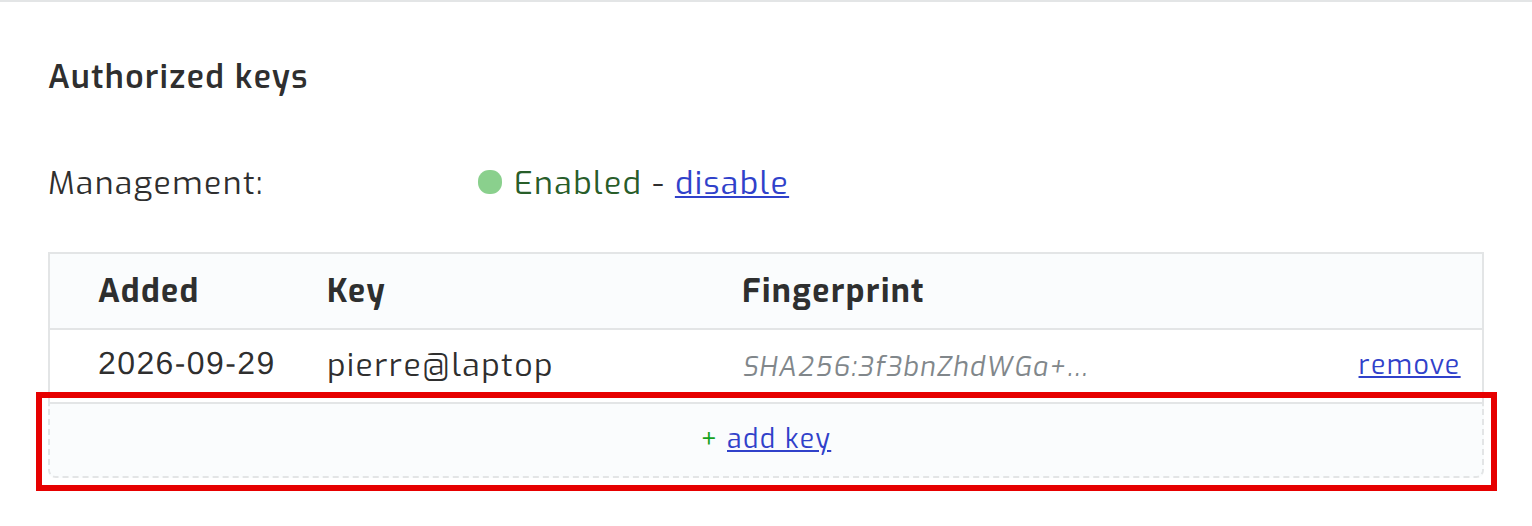
Add your public key under "Authorized keys".
If you do not already have a key, create one on your computer:
ssh-keygen -t ed25519Click "add key" and paste your public key, or import it from your GitHub account. The public key is the output of:
cat ~/.ssh/*.pub
*On Windows, open PowerShell and run type $env:USERPROFILE\.ssh\*.pub instead.
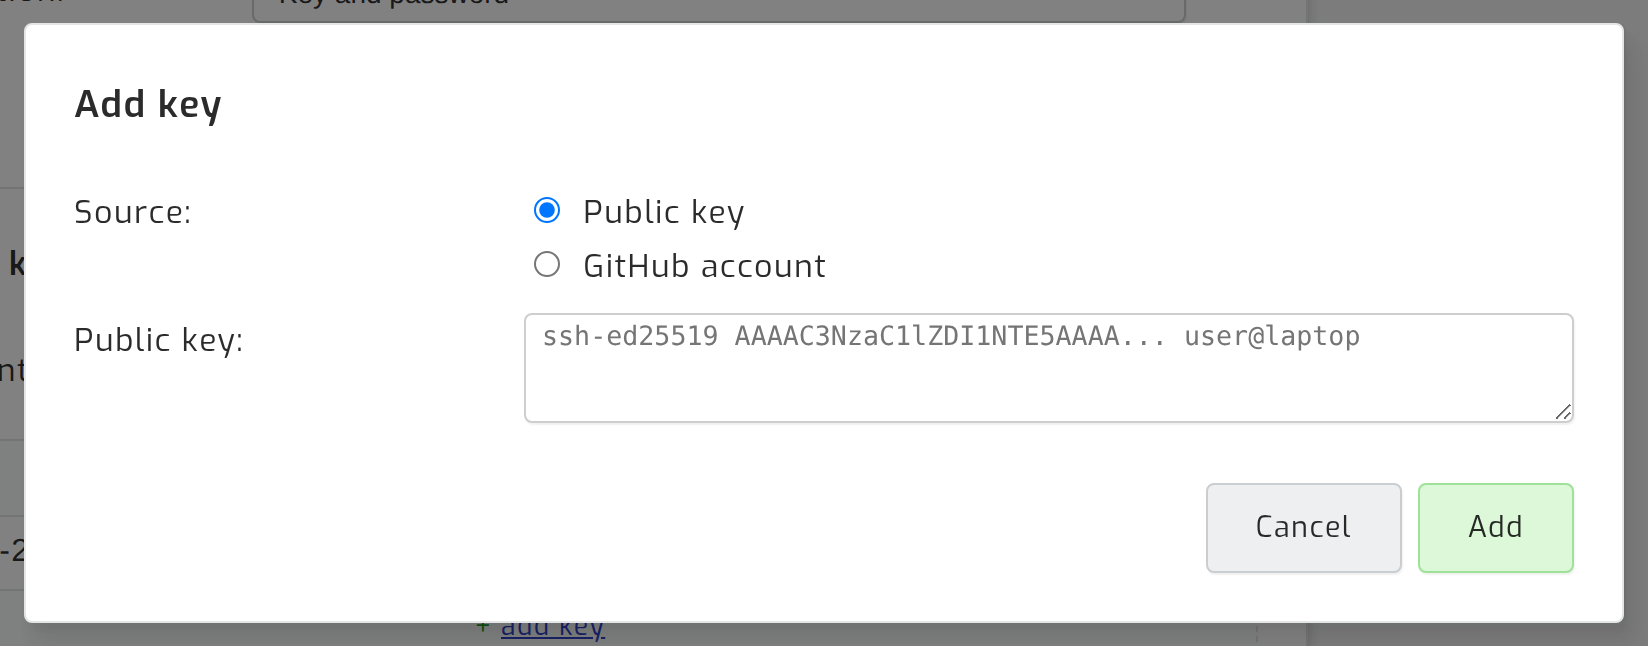
Connect with the command shown under usage instructions. With your key installed, no password is asked:
ssh solar-assistant@192.168.1.100Key management security
Key management as described in step 3b above is disabled by default. The "enable" link in the screenshot needs to be pressed to enable it. When you do so and you are not browsing the site via a local IP connection such as http://192.168.0.100, it will provide a link to switch over to local IP browsing. This is so that an admin user such as your solar installer cannot gain SSH access to your site remotely.
While management is enabled, keys can be added and removed. Once you are done, disable it again - the keys you added stay installed. Should you want an installer or SolarAssistant support to add their own key remotely, enable management while they work and disable it afterwards.
Password logins are only accepted on your local network. Connectivity "Local and remote", described on the remote SSH access page, requires authentication to be "Key only", so your password is never exposed to the internet.
Useful information
From a computer that can already log in with the password, install your key without the web page:
ssh-copy-id solar-assistant@192.168.1.100You can become the root user with the command below:
sudo su -View CPU, memory and process information. Exit by pressing 'q'.
htopShow network connection and route information:
ip addr
ip route
View storage information.
df -lhEdit WiFi SSID and password, then reload the network connection service and view output logs.
nano /etc/wpa_supplicant/wpa_supplicant.conf
systemctl reload auto-hotspot
journalctl -u auto-hotspot -n 100 -f
Edit the X.Org screen configuration, then stop and start the interactive kiosk.
nano /home/kiosk/xset.sh
systemctl stop kiosk
systemctl start kiosk
Check the status of SolarAssistant and related services:
systemctl status solar-assistant
systemctl status auto-hotspot
systemctl status grafana-server
systemctl status influxdb
systemctl status mosquitto