Remote SSH access
We've designed our remote SSH with highest security and privacy in mind. It does not require any port forwarding setup and can be enabled for any site with SolarAssistant Pro, including sites still running a trial. If Pro lapses, remote SSH stops with it.
Step 1 - Ensure local SSH works
Remote SSH uses a key, not a password, so set up local SSH access first and confirm you can connect on your own network. Once that works with your key, carry on below.
Step 2 - Enable remote SSH on device
On your SolarAssistant device, navigate to Configuration → System and enable remote SSH connectivity.
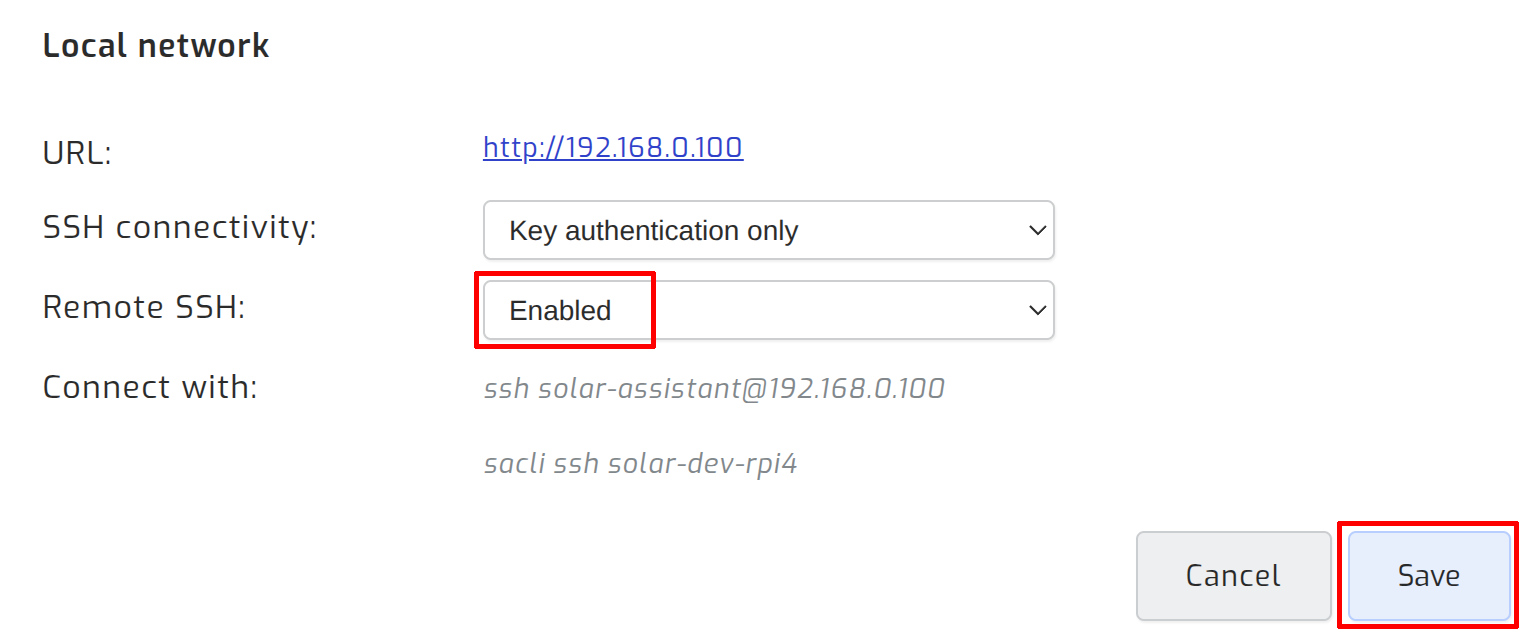
Step 3 - Connect remotely
Navigate to the sites page and click view site. Grant SSH to the user that must be able to connect remotely.
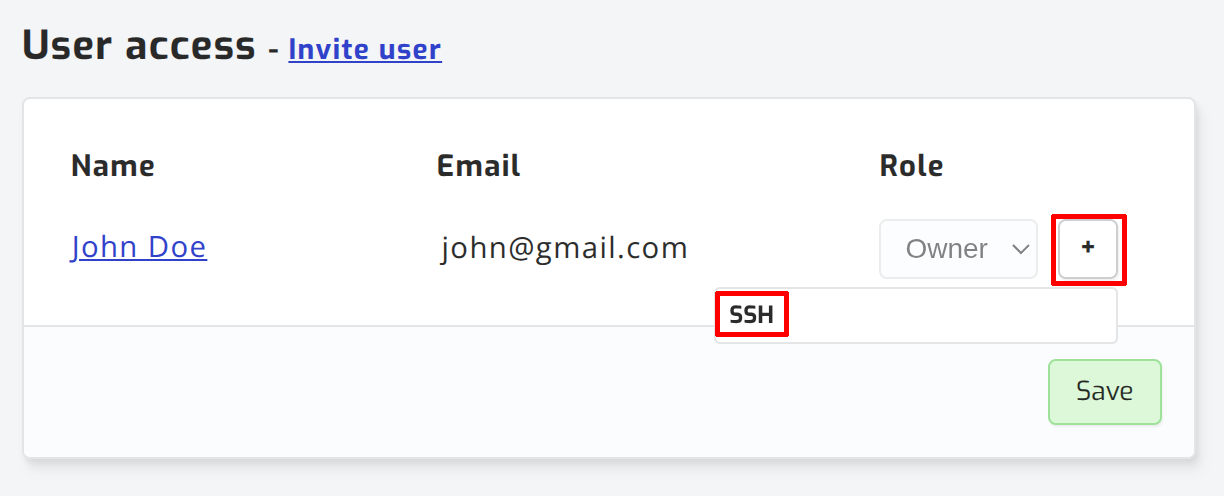
The easiest way to connect is via the SolarAssistant CLI (sacli). Please see installation steps on the sacli GitHub page. It's a 7mb executable with no dependencies.
Connect to your site with the command below:
If you prefer using the normal SSH command, you can add the following SSH config:
*If you are using Windows, open %USERPROFILE%\.ssh\config with Notepad.
Paste the config below:
User solar-assistant
ProxyCommand sacli ssh proxy %h
Now you can connect using the site's hostname:
Security and privacy
The SolarAssistant proxy server acts as a raw TCP connection forwarder. Your SSH traffic is end-to-end encrypted by your laptop/workstation as part of the normal working of SSH. Our servers can not inspect or intercept the contents of your SSH session. This gives you the highest level of privacy.
Your API token is sent to the SolarAssistant proxy server to authorize forwarding the raw TCP connection to your SolarAssistant device SSH port, but it does not provide authentication with your device SSH service. This means in the unlikely event that the SolarAssistant proxy servers are compromised, the attacker can only reach your SSH port and still needs to authenticate with it.
Since your SSH key and password is never entered into a SolarAssistant cloud system, the attacker can't get your SolarAssistant device SSH credentials from us. The key advantage is you are not dependent on a cloud service (SolarAssistant) staying secure.
Don't take our word for it. Ask your favourite LLM to confirm by reading our sacli ssh source code.