Connecting the EG4 GYLL battery
Introduction
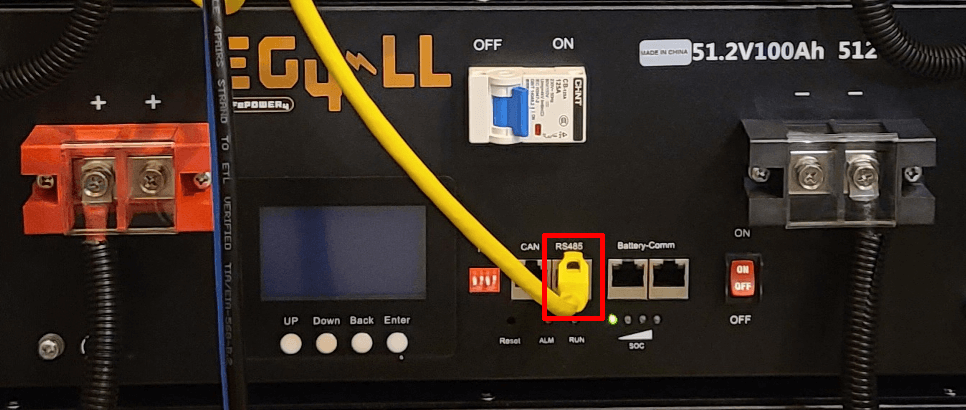
If you buy a EG4 GYLL battery from Signature Solar, you will typically get a USB RS485 adapter and cable with it. This adapter and cable can be used to connect your SolarAssistant Raspberry PI to the battery.
With the latest EG4 firmware if you set the DIP switch to 1 it will change the protocol of the battery.
SolarAssistant supports the default protocol of the battery and not the address 1 protocol. Start your DIP switch
addresses with the first battery set to 2, the next battery to 3, then 4, etc.
Select the protocol in SolarAssistant that matches your battery:
| Battery model | Protocol |
|
EG4 LL EG4 LIFEPOWER4 with LCD | USB to Modbus RS485 |
| EG4 LIFEPOWER4 without LCD | USB to Narada RS485 |
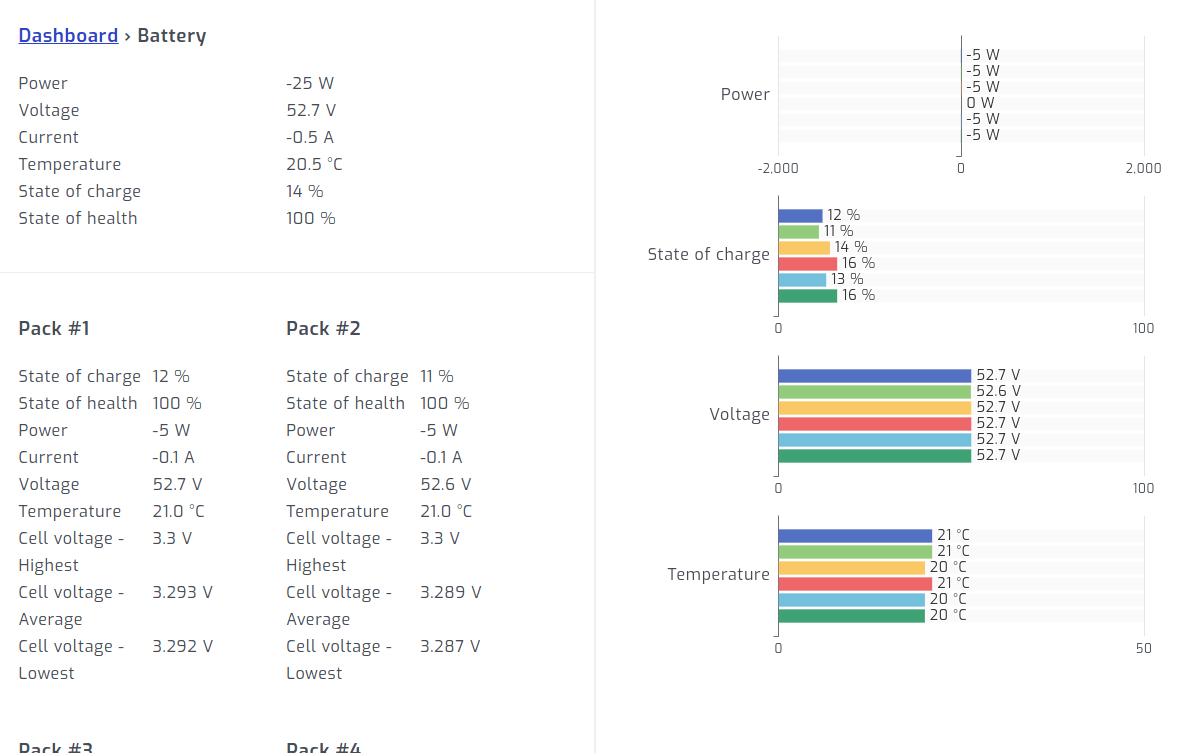
Once connected, you should see individual battery metrics as shown below:
How to connect multiple EG4 GYLL batteries
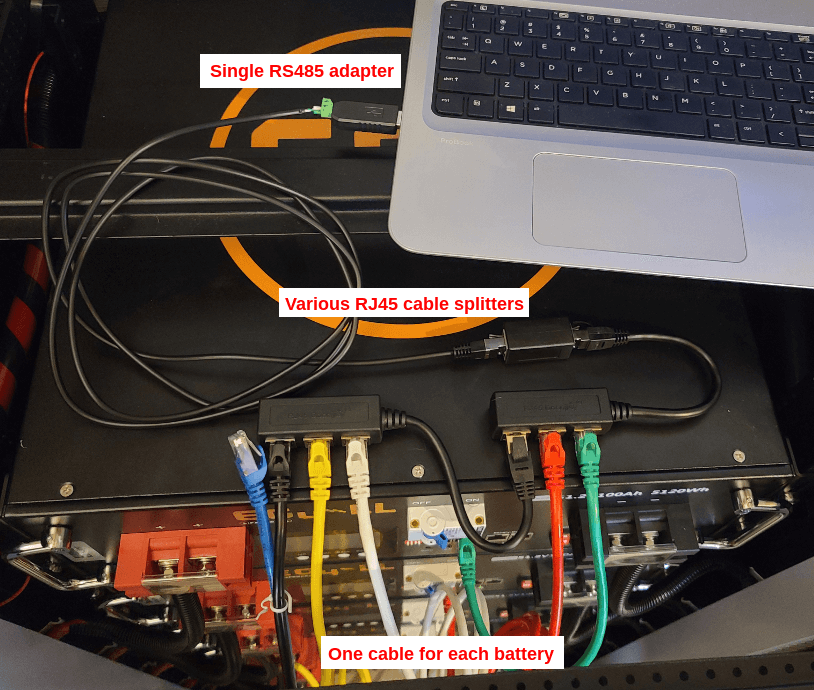
Some of the EG4 GYLL batteries have a single RS485 port. This means we have to wire the ports of all batteries physically into a single cable. When selecting a RJ45 splitter ensure that it simply connects the pins of the ports together. There shouldn't be an electronic board inside such as a network hub that receives and sends messages. This is RS485, not ethernet!
If you are reading the battery via CAN or RS485 to the inverter, please use the parallel communication ports to use "Passive Reading". This lets us connect to the battery pack as if we were another battery in the bank. You should see an open parallel communication port on the master and on the last battery in the pack. You may have to test both, since which one works depends on the variant you have. However, this would let us read the data the batteries are sharing with one another, leaving the RS485/CAN ports open for inverter connection.
Troubleshooting
If you are having trouble reading your batteries and you have a windows laptop, we recommend testing your setup with the official software provided by Signature Solar. If your laptop is able to read the batteries, then SolarAssistant will also be able to read them.
You should not have any gaps in your battery addresses, meaning if address 3 is missing, then SolarAssistant will only read up to address 2.
Signature Solar EG4 page - Scroll down to "Resources" to download software.
Signature Solar EG4 monitoring software setup video